

Transformers & Scheduler
While running an integration manually is great for testing and initial setup, real-world data flows need to happen automatically, reliably, and in the right format. That’s where Alumio’s flexible and robust Scheduler and Transformer features come into play.
Schedulers help automate your Routes, allowing you to set up each part of your integration to run at precise intervals, whether that’s every minute, hourly, or even based on business-specific timings. This ensures that data flows seamlessly between systems without manual intervention, minimizing errors and improving efficiency.
Transformers empower you to take control of how data is handled. With these powerful tools, you can adapt, reshape, and enrich your data as it flows through your Routes. Whether you need to modify data formats, filter out redundant information, or apply specific conditions, Transformers allow you to tailor your integrations to match the unique needs of your business processes.
In summary, Schedulers ensure your integrations run automatically based on a time frequency of your choosing, while Transformers help you specifically tailor the data you retrieve and send between applications and endpoints. It’s also important to be aware and understand that you can uniquely Schedule and Transform each part of your integration within Alumio, i.e., the Incoming and Outgoing Configuration, as well as the Route itself.
Transform and schedule your integration
Let’s continue to improve and modify our basic Picqer to Shopify integration, by applying some basic Alumio Transformers to enrich the data being exchanged. Here’s how it works within the Route-builder:
Step 3: Applying Transformers to modify data
As per our example integration, where we integrate product data from Picqer within Shopify, it may require some key refinements. For instance, let’s assume we need to modify the format of the product data from Picqer to match the format of Shopify, split the product lists coming from Picqer, and more.
Here’s how you can start configuring Transformers within Alumio to enrich your integrations:
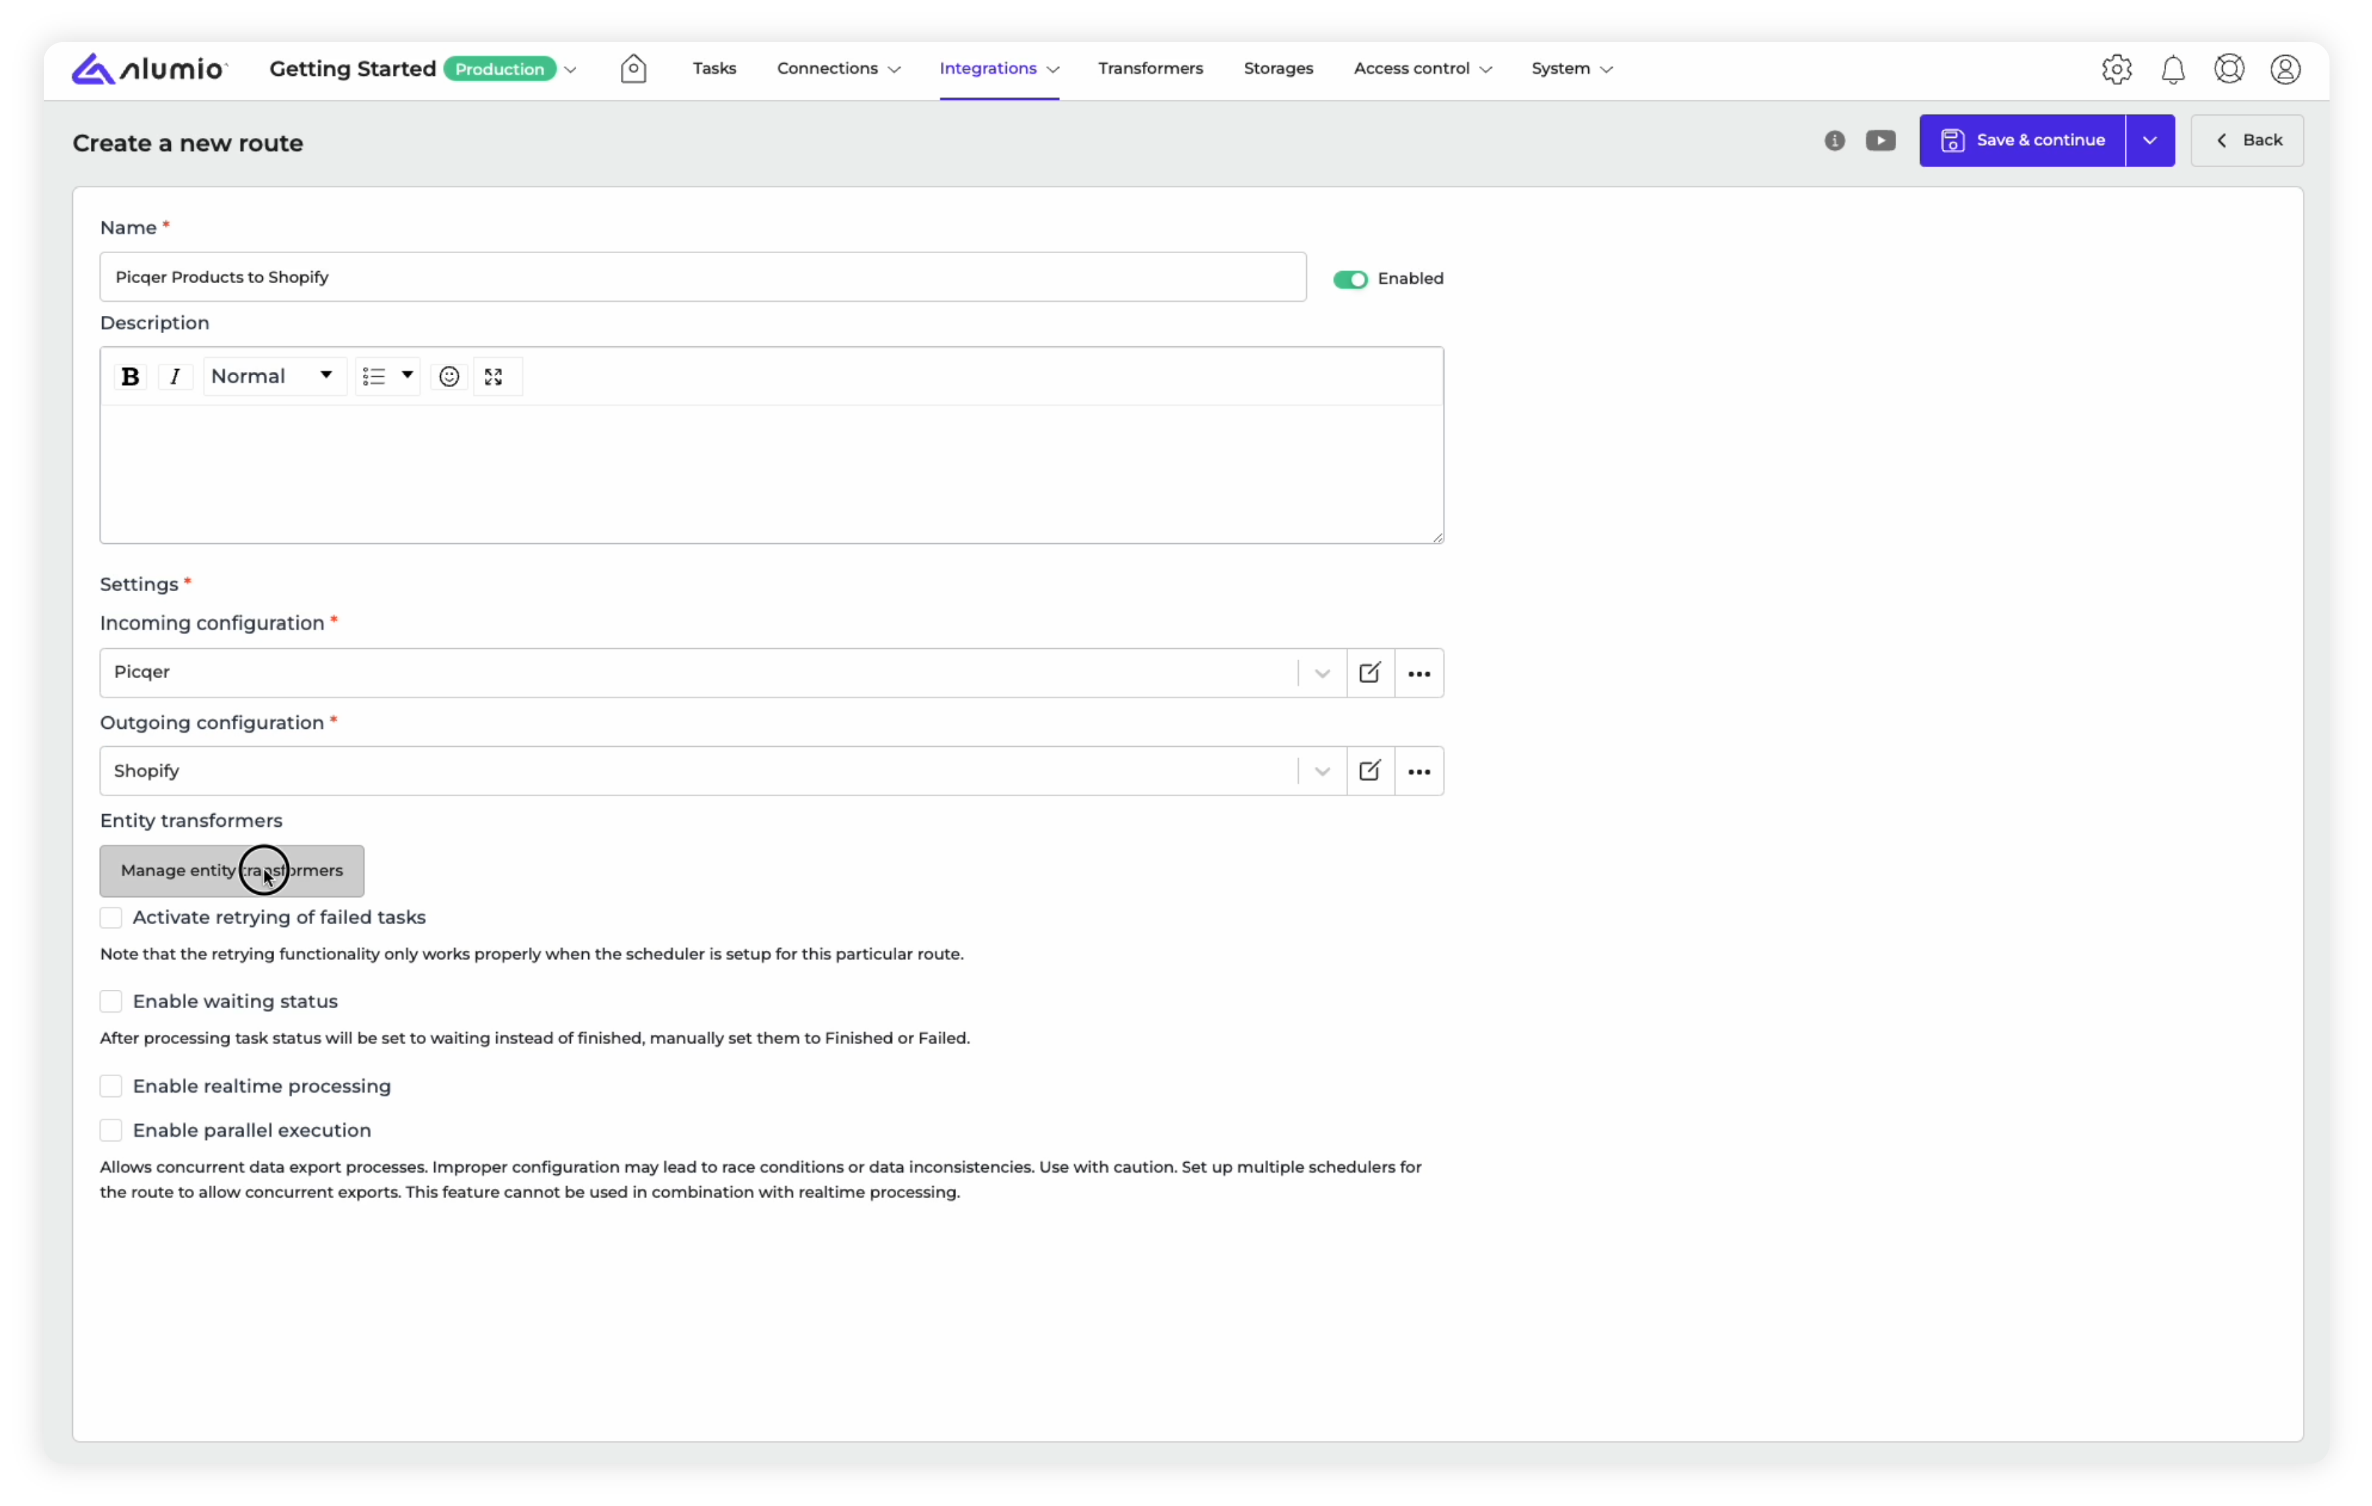
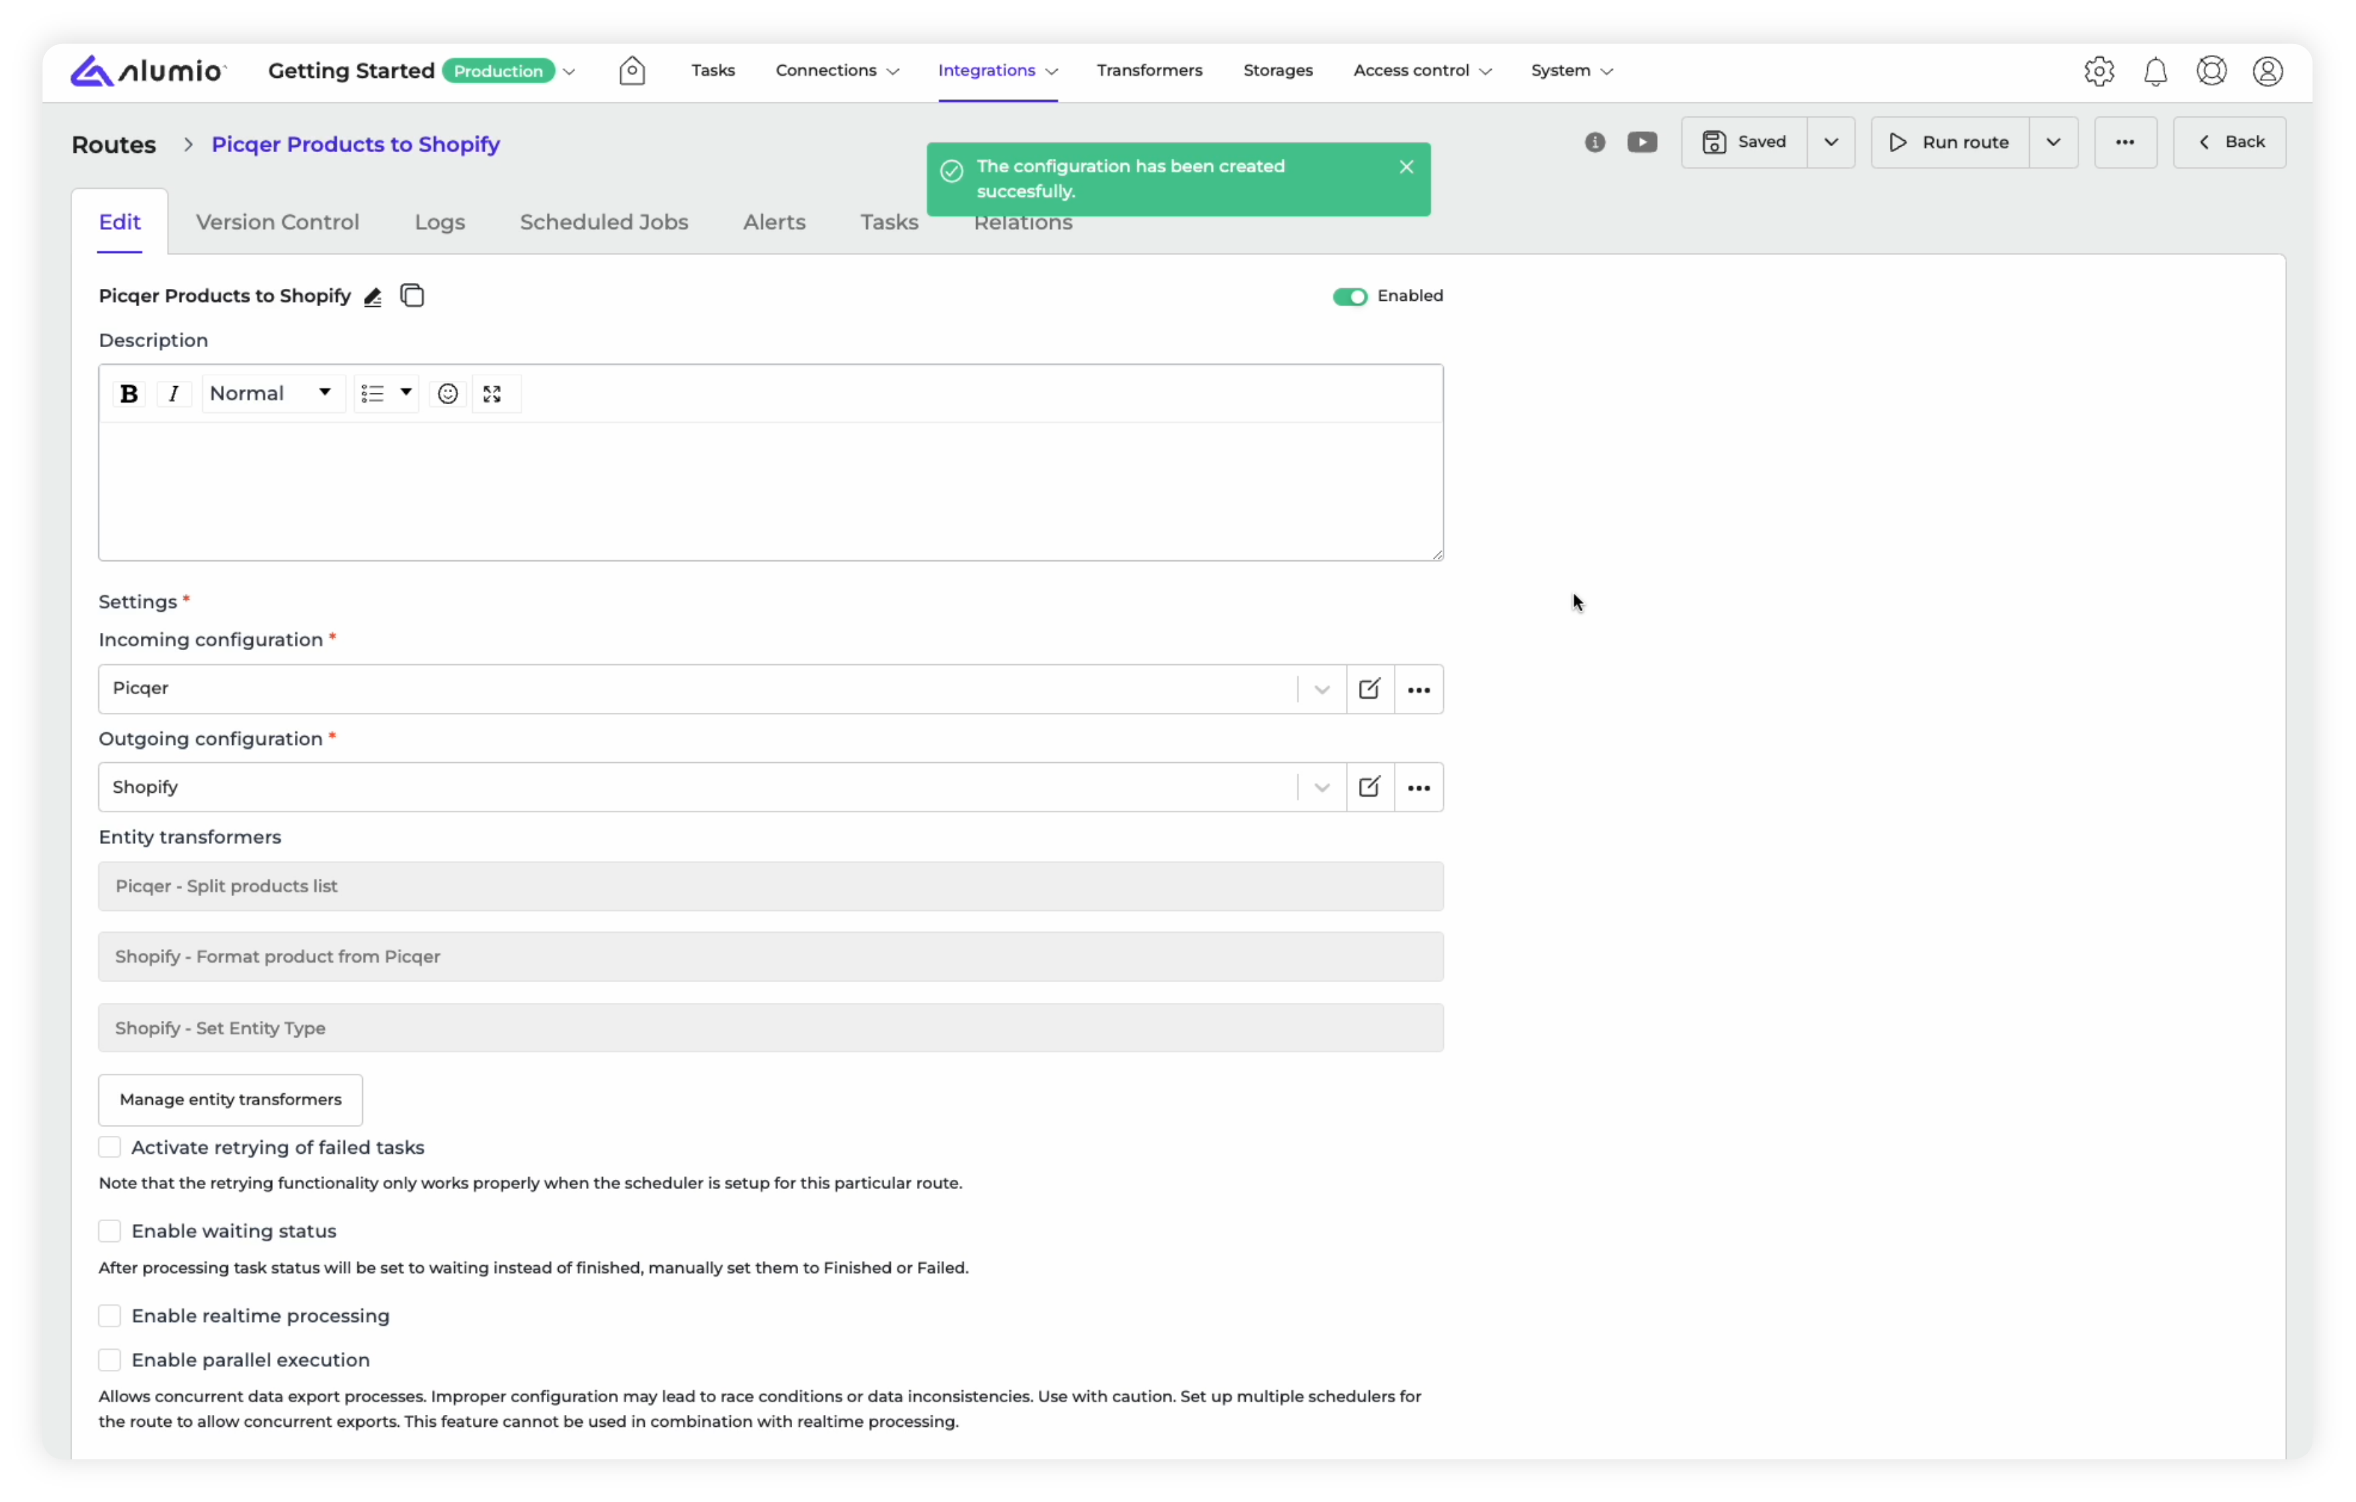
1. Build Transformers: Within the route-builder where you set up your Incoming Configuration from Picqer and Outgoing Configuration to Shopify, you have to select the “Manage entity Transformers” button.
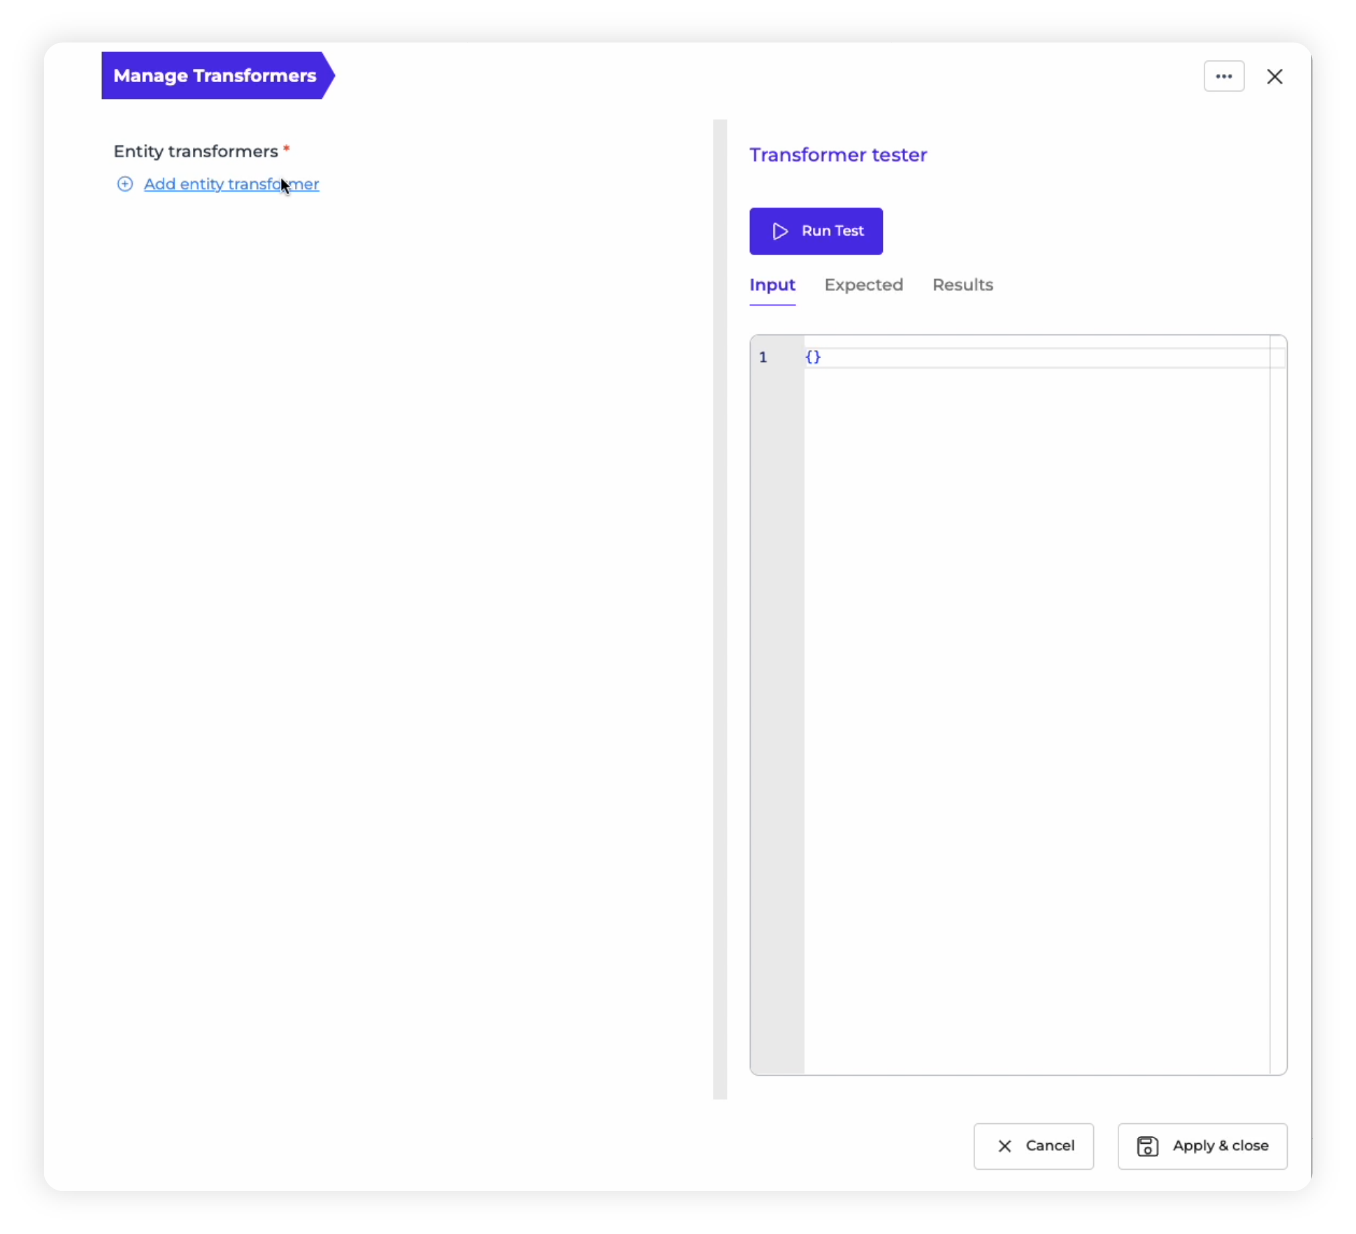
2. Add a Transformer: As the Transformer-builder opens up, you have to choose the “Add entity Transformer” button to configure your first Transformer.
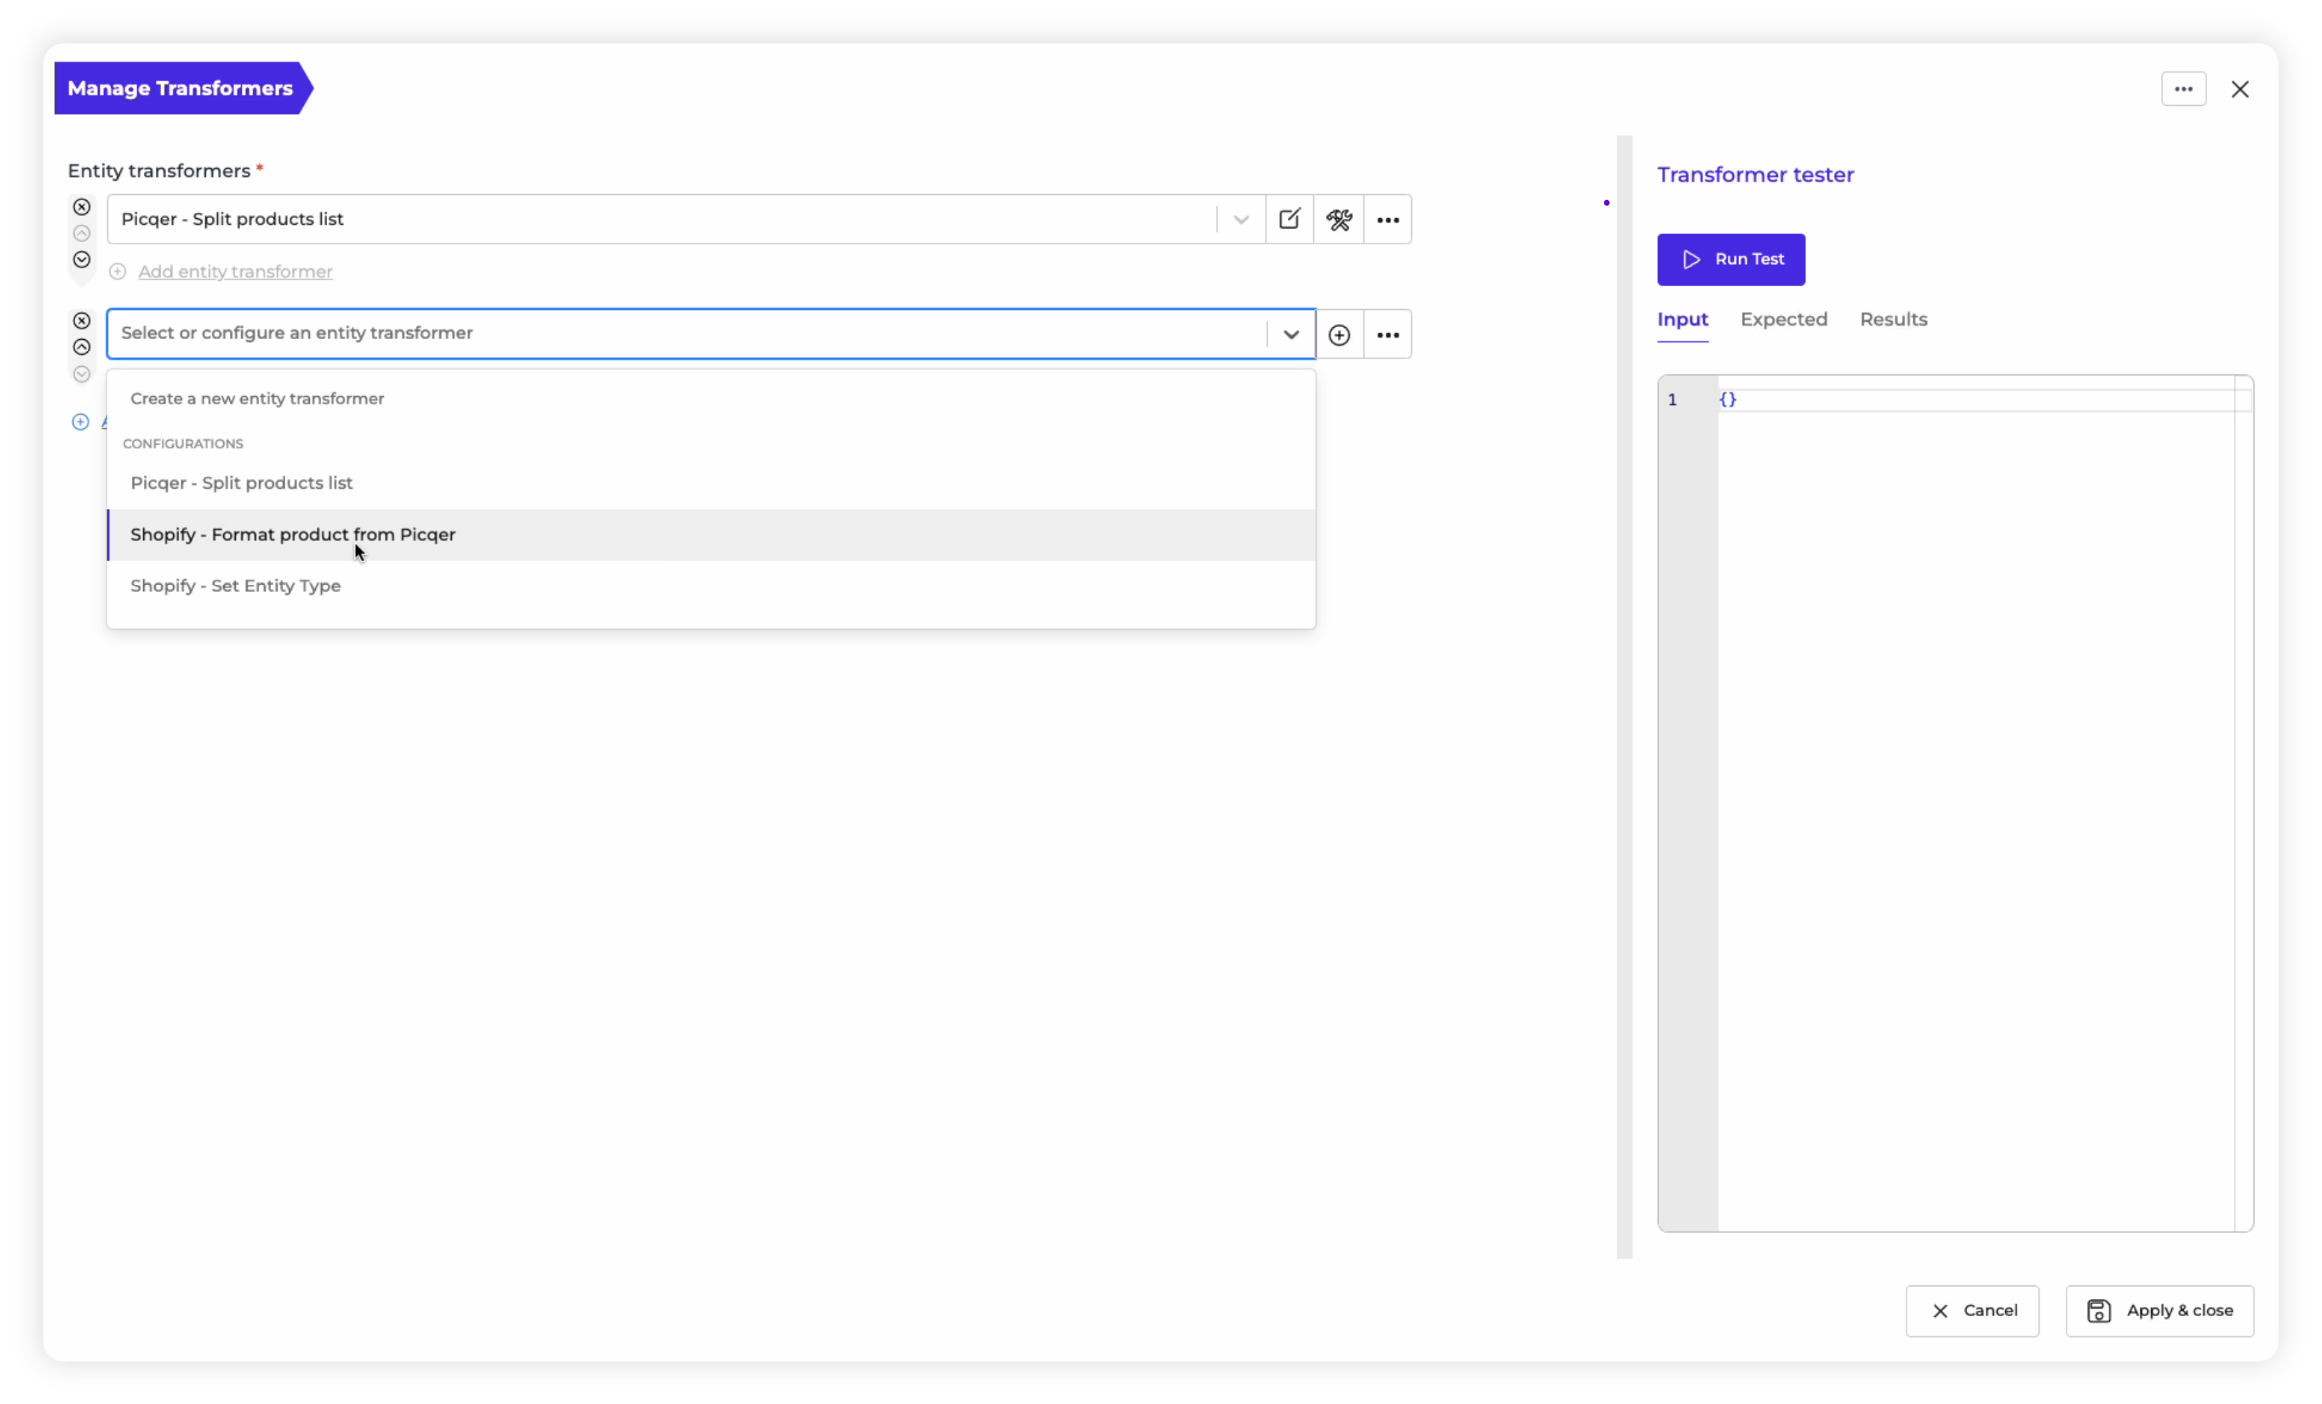
3. Select a Transformer: Next, you have to select a Transformer from the drop-down menu that will show you the list of available Transformers based on your integration.
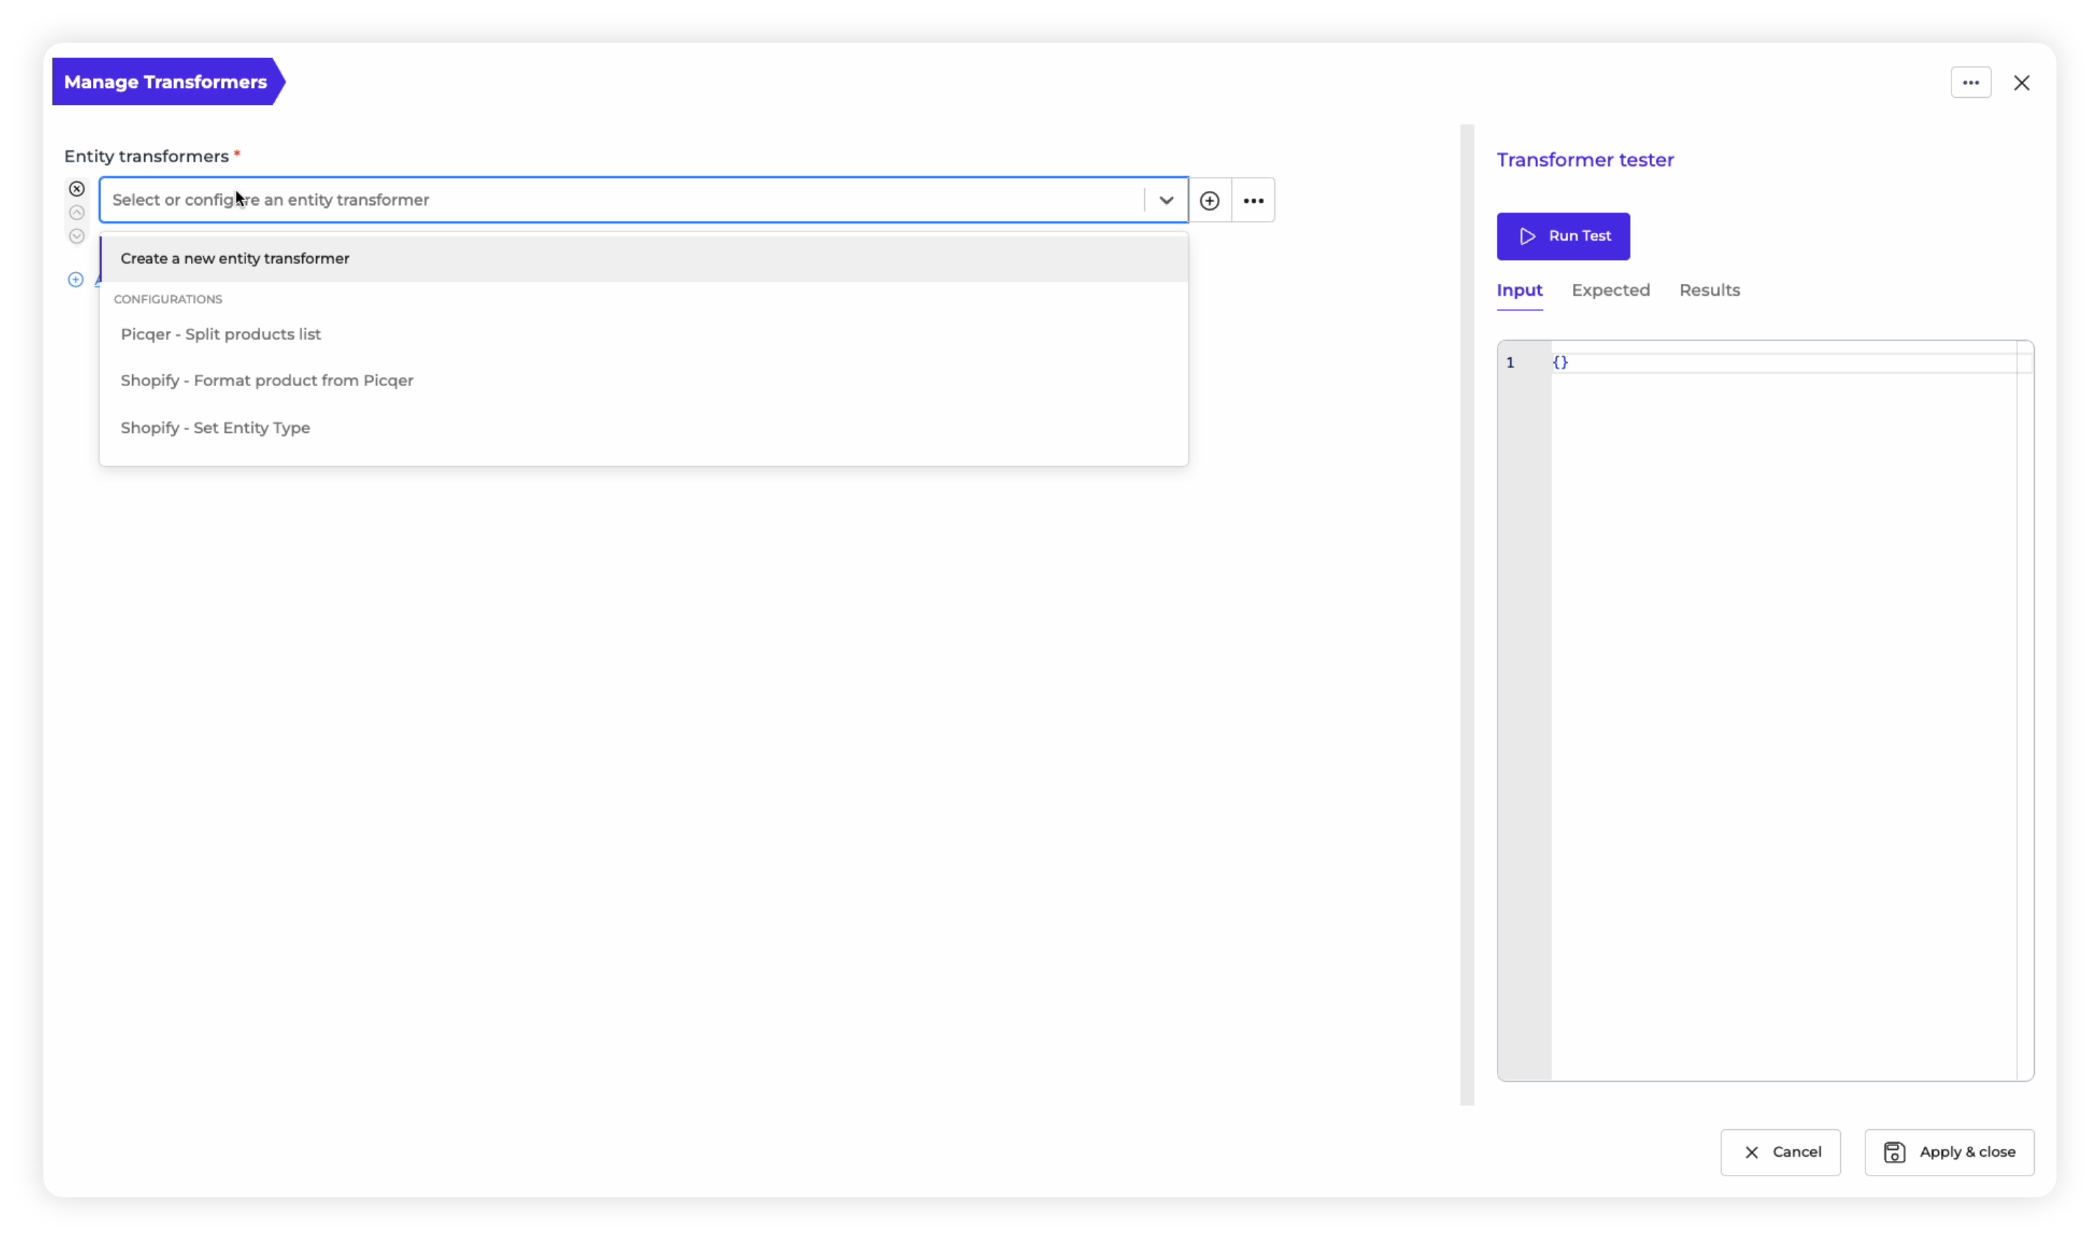
Note: Optionally, you can choose the “Create a new entity Transformer” option, to create your own custom Transformer from scratch.
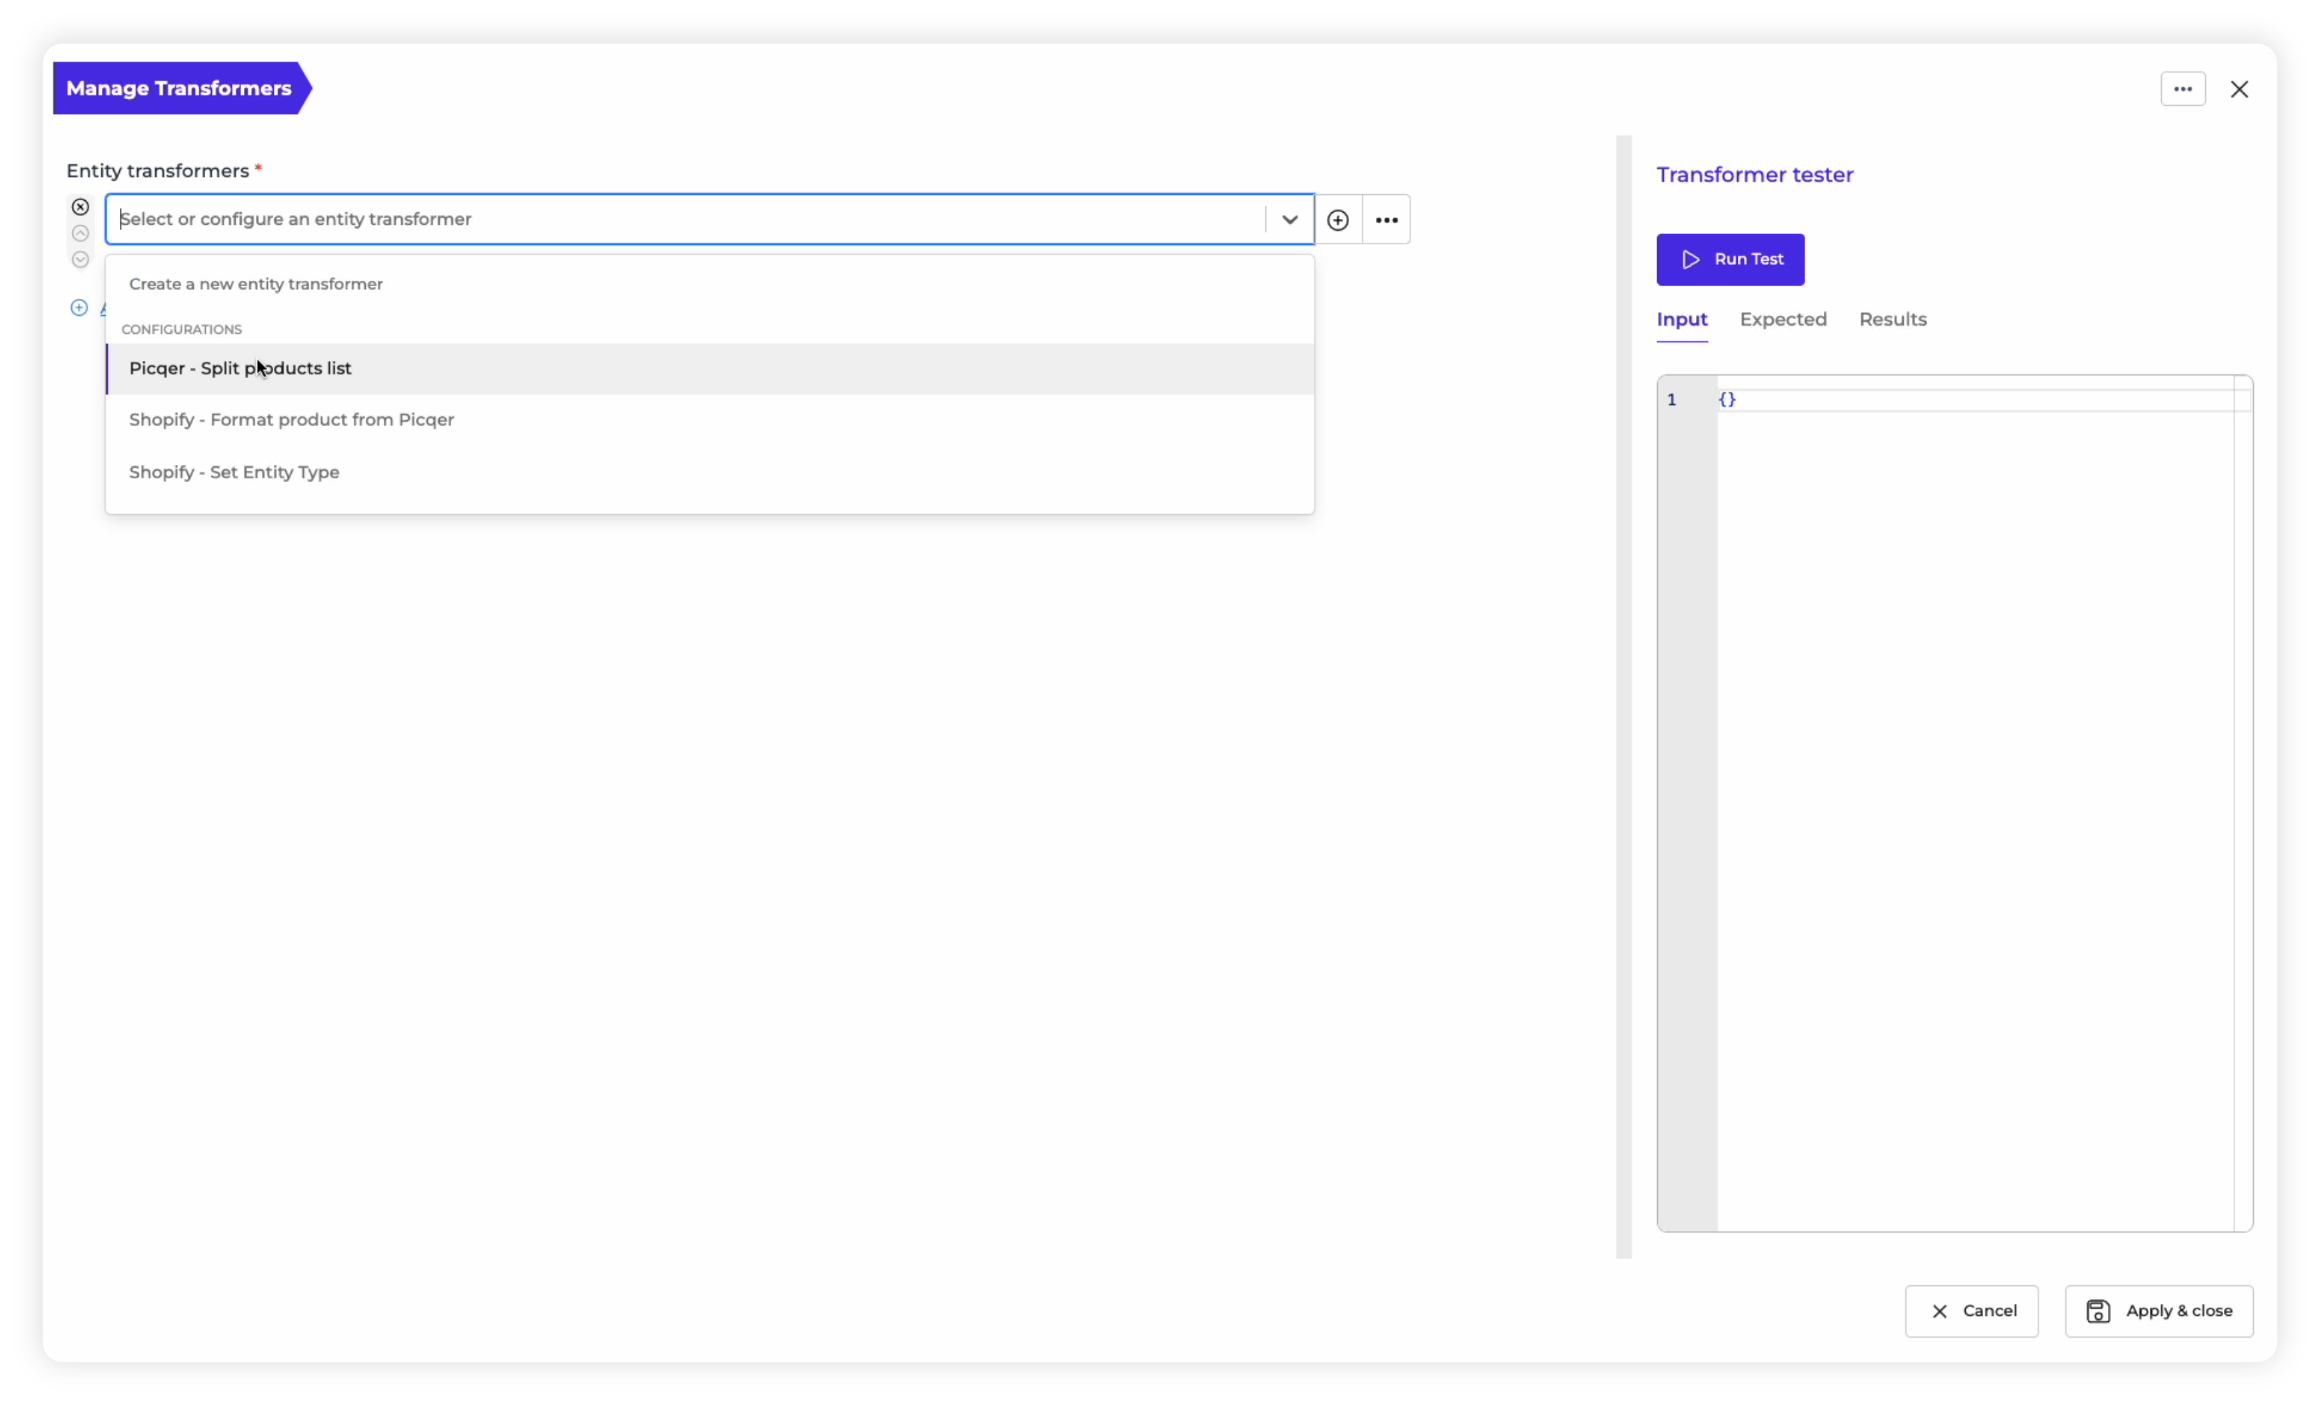
4. Split products: Next, you have to select a Transformer from the drop-down menu that will show you the list of available Transformers based on your integration. Let’s assume we want to split up the list of products we get from Picqer so that it can create Tasks to process each product one by one. In this case, we can select the “Picqer — Split Products List” Transformer.
5. Format product details: Next, we want to transform the data that we get from Picqer into a format and structure that works best with Shopify. We simply choose to add another Transformer, where we select “Shopify — Format product from Picqer” from the dropdown menu.
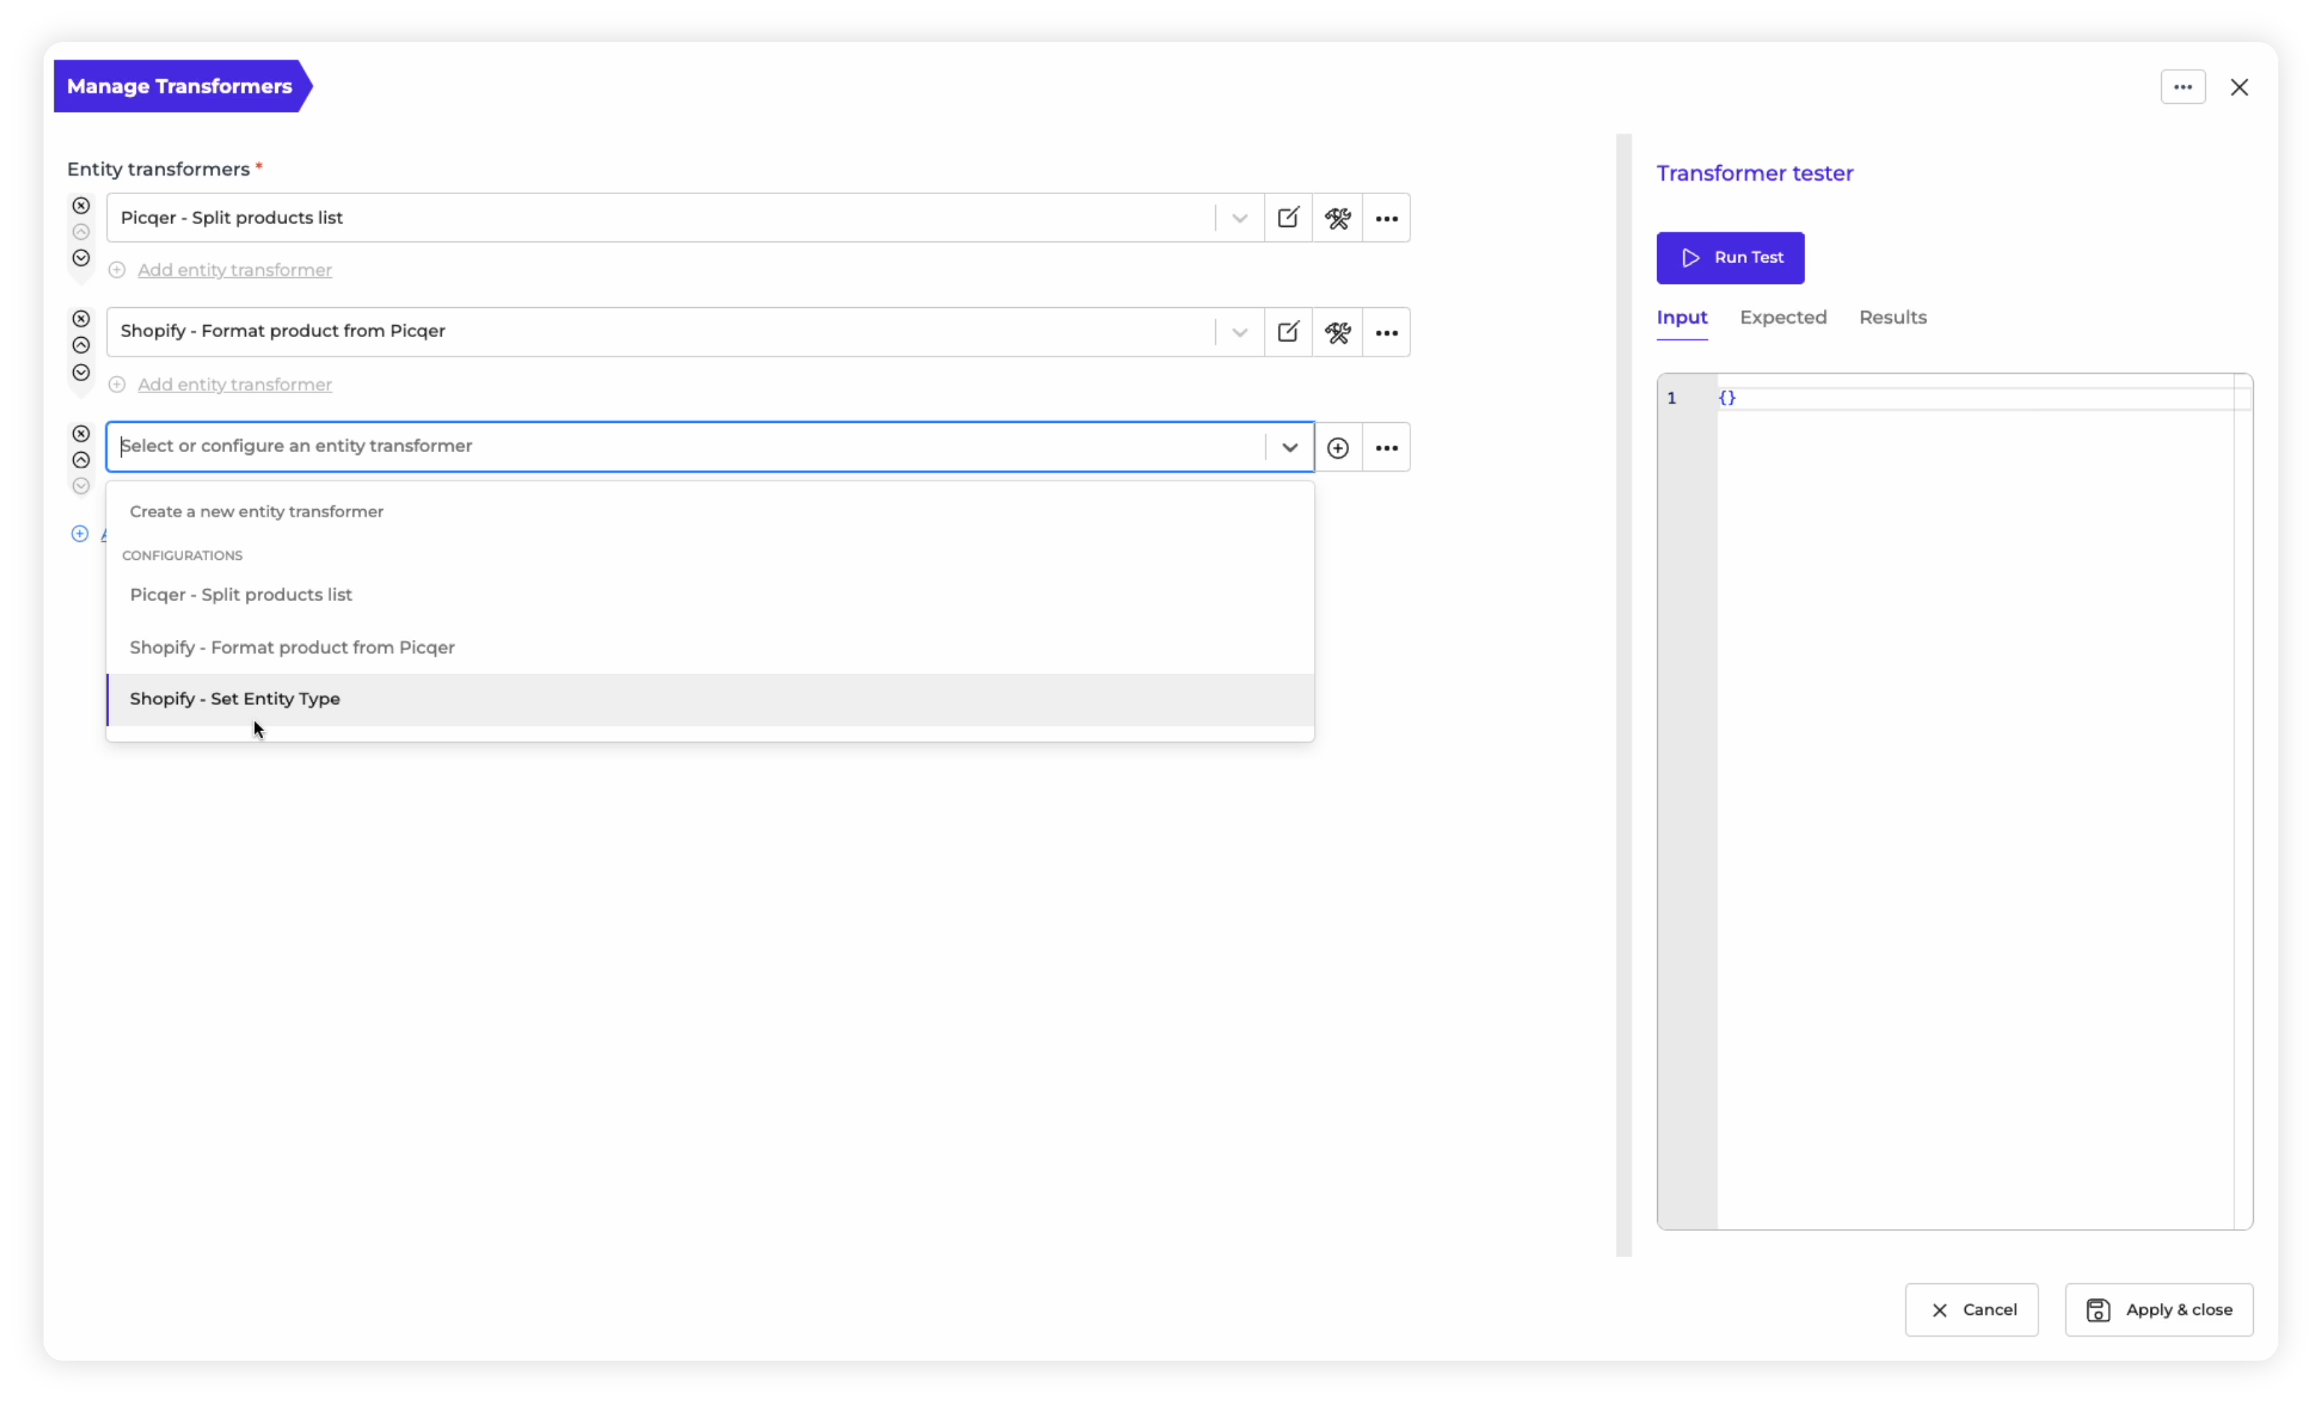
6. Set entity type: Another valuable Transformer you can incorporate is the “Shopify – Set Entity Type” Transformer. This Transformer assigns a specific identifier within Alumio, ensuring that when Tasks are generated, the product number is clearly displayed.
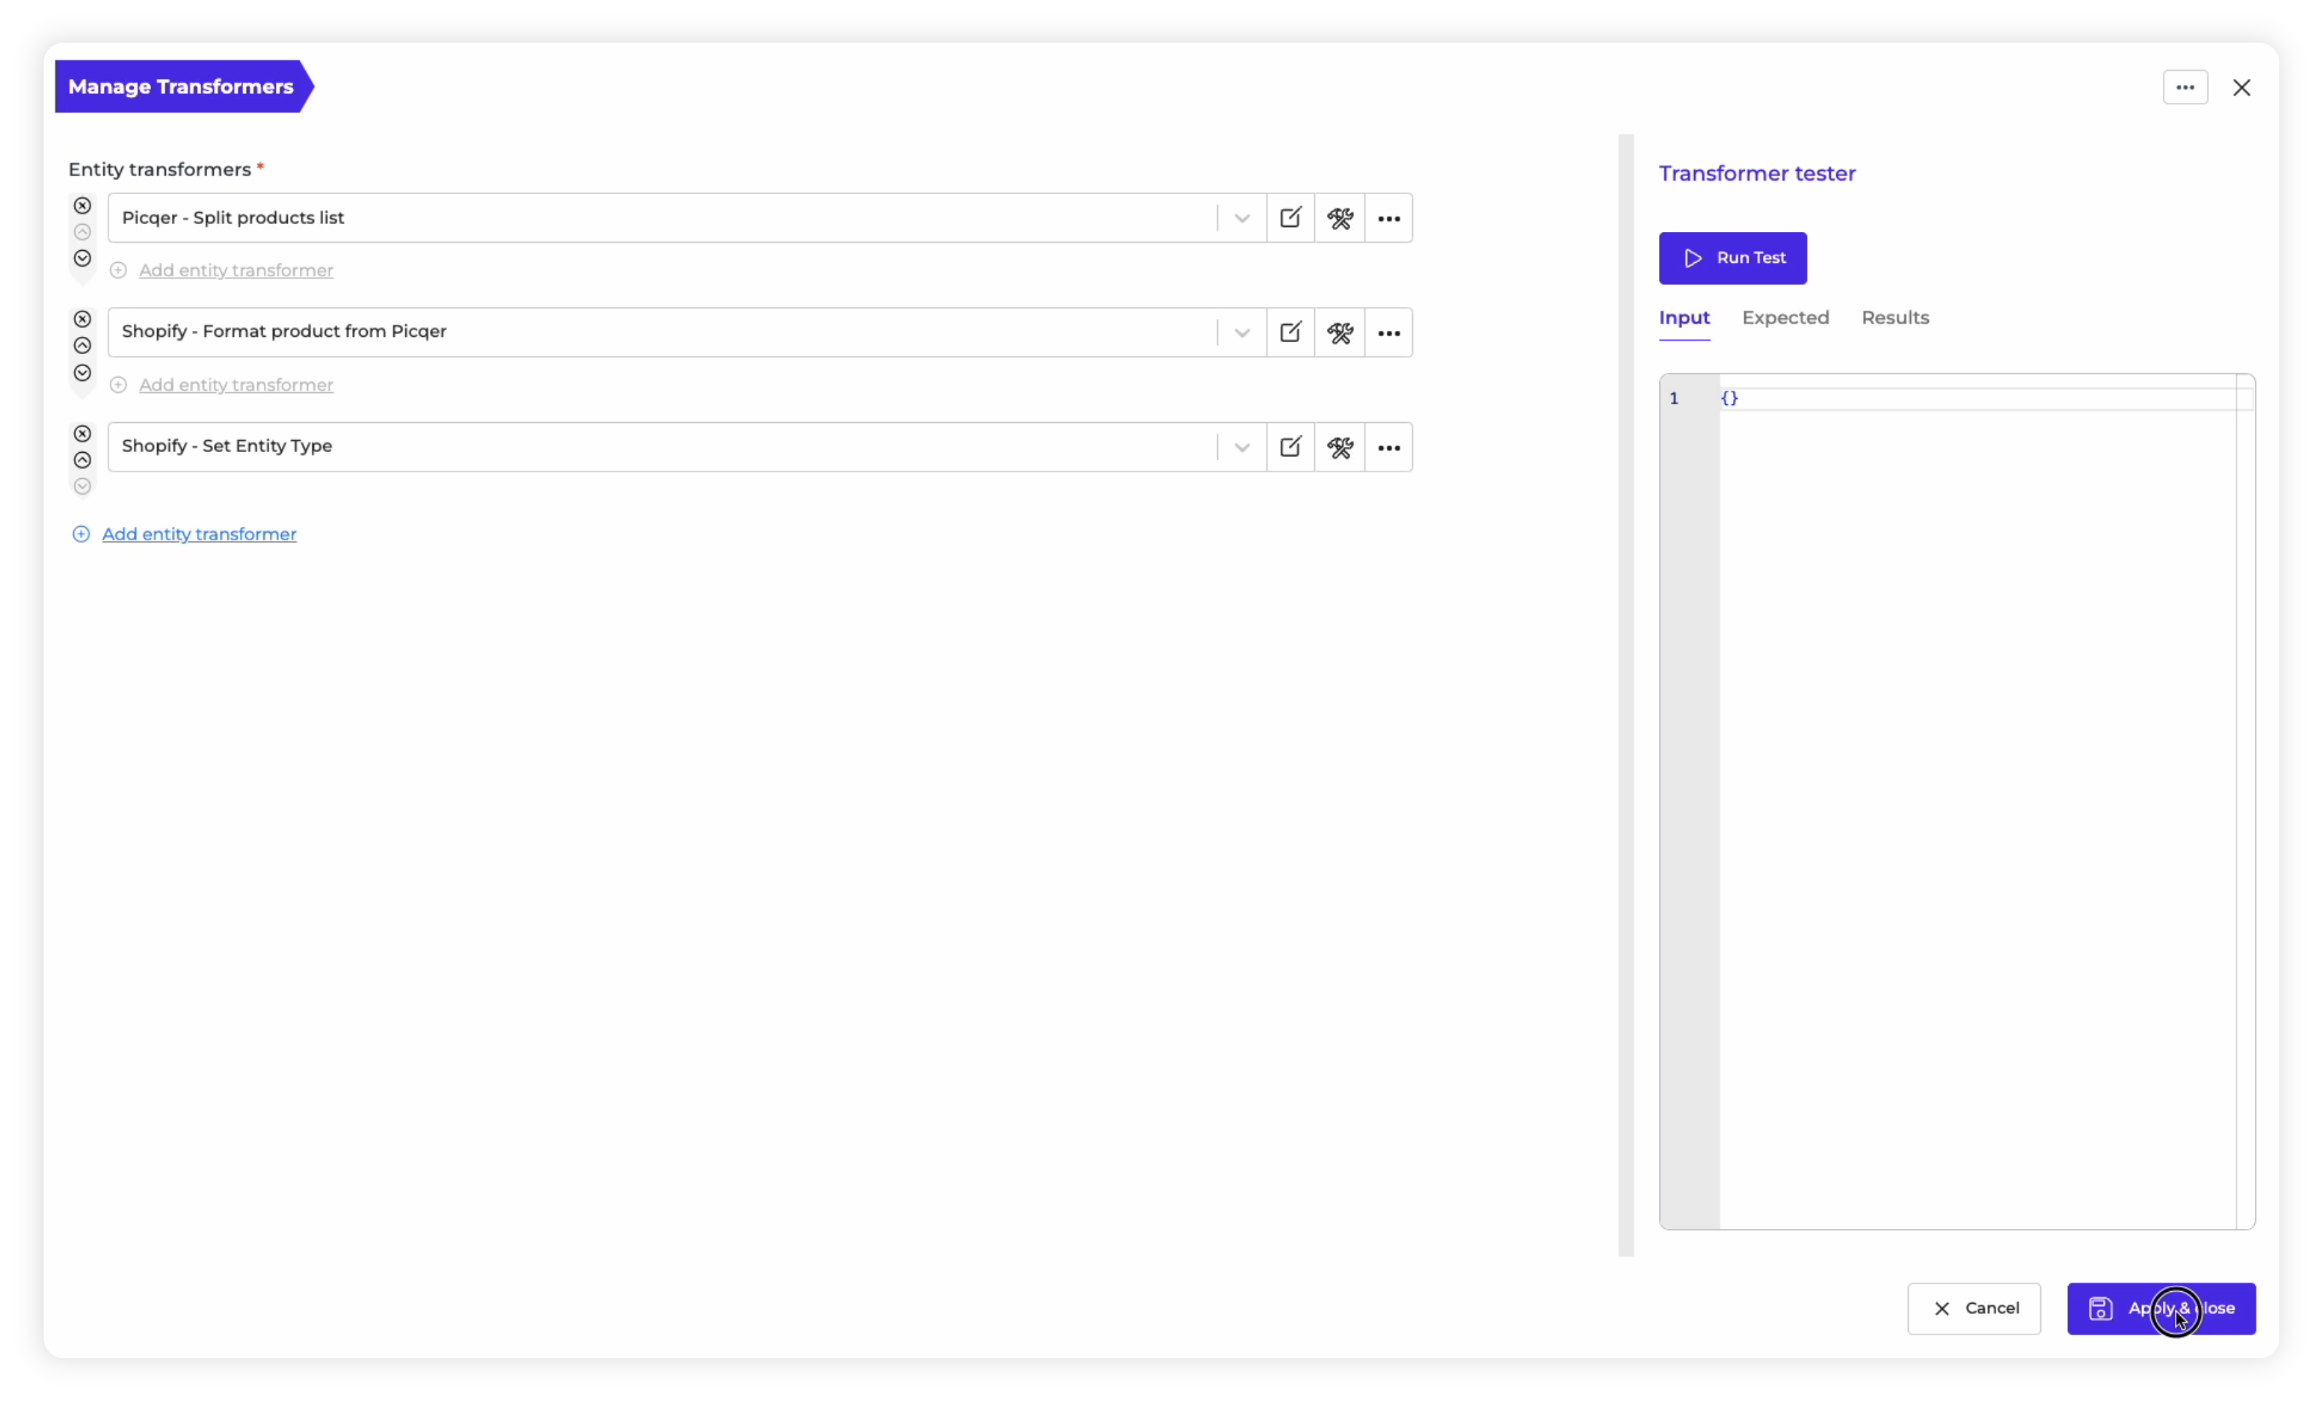
7. Finalize Transformers: After selecting all the Transformers you wish to apply to the Route, you can choose to use the “Transformer Tester” to test if they all work. To implement these Transformers, click on “Apply & Save.”
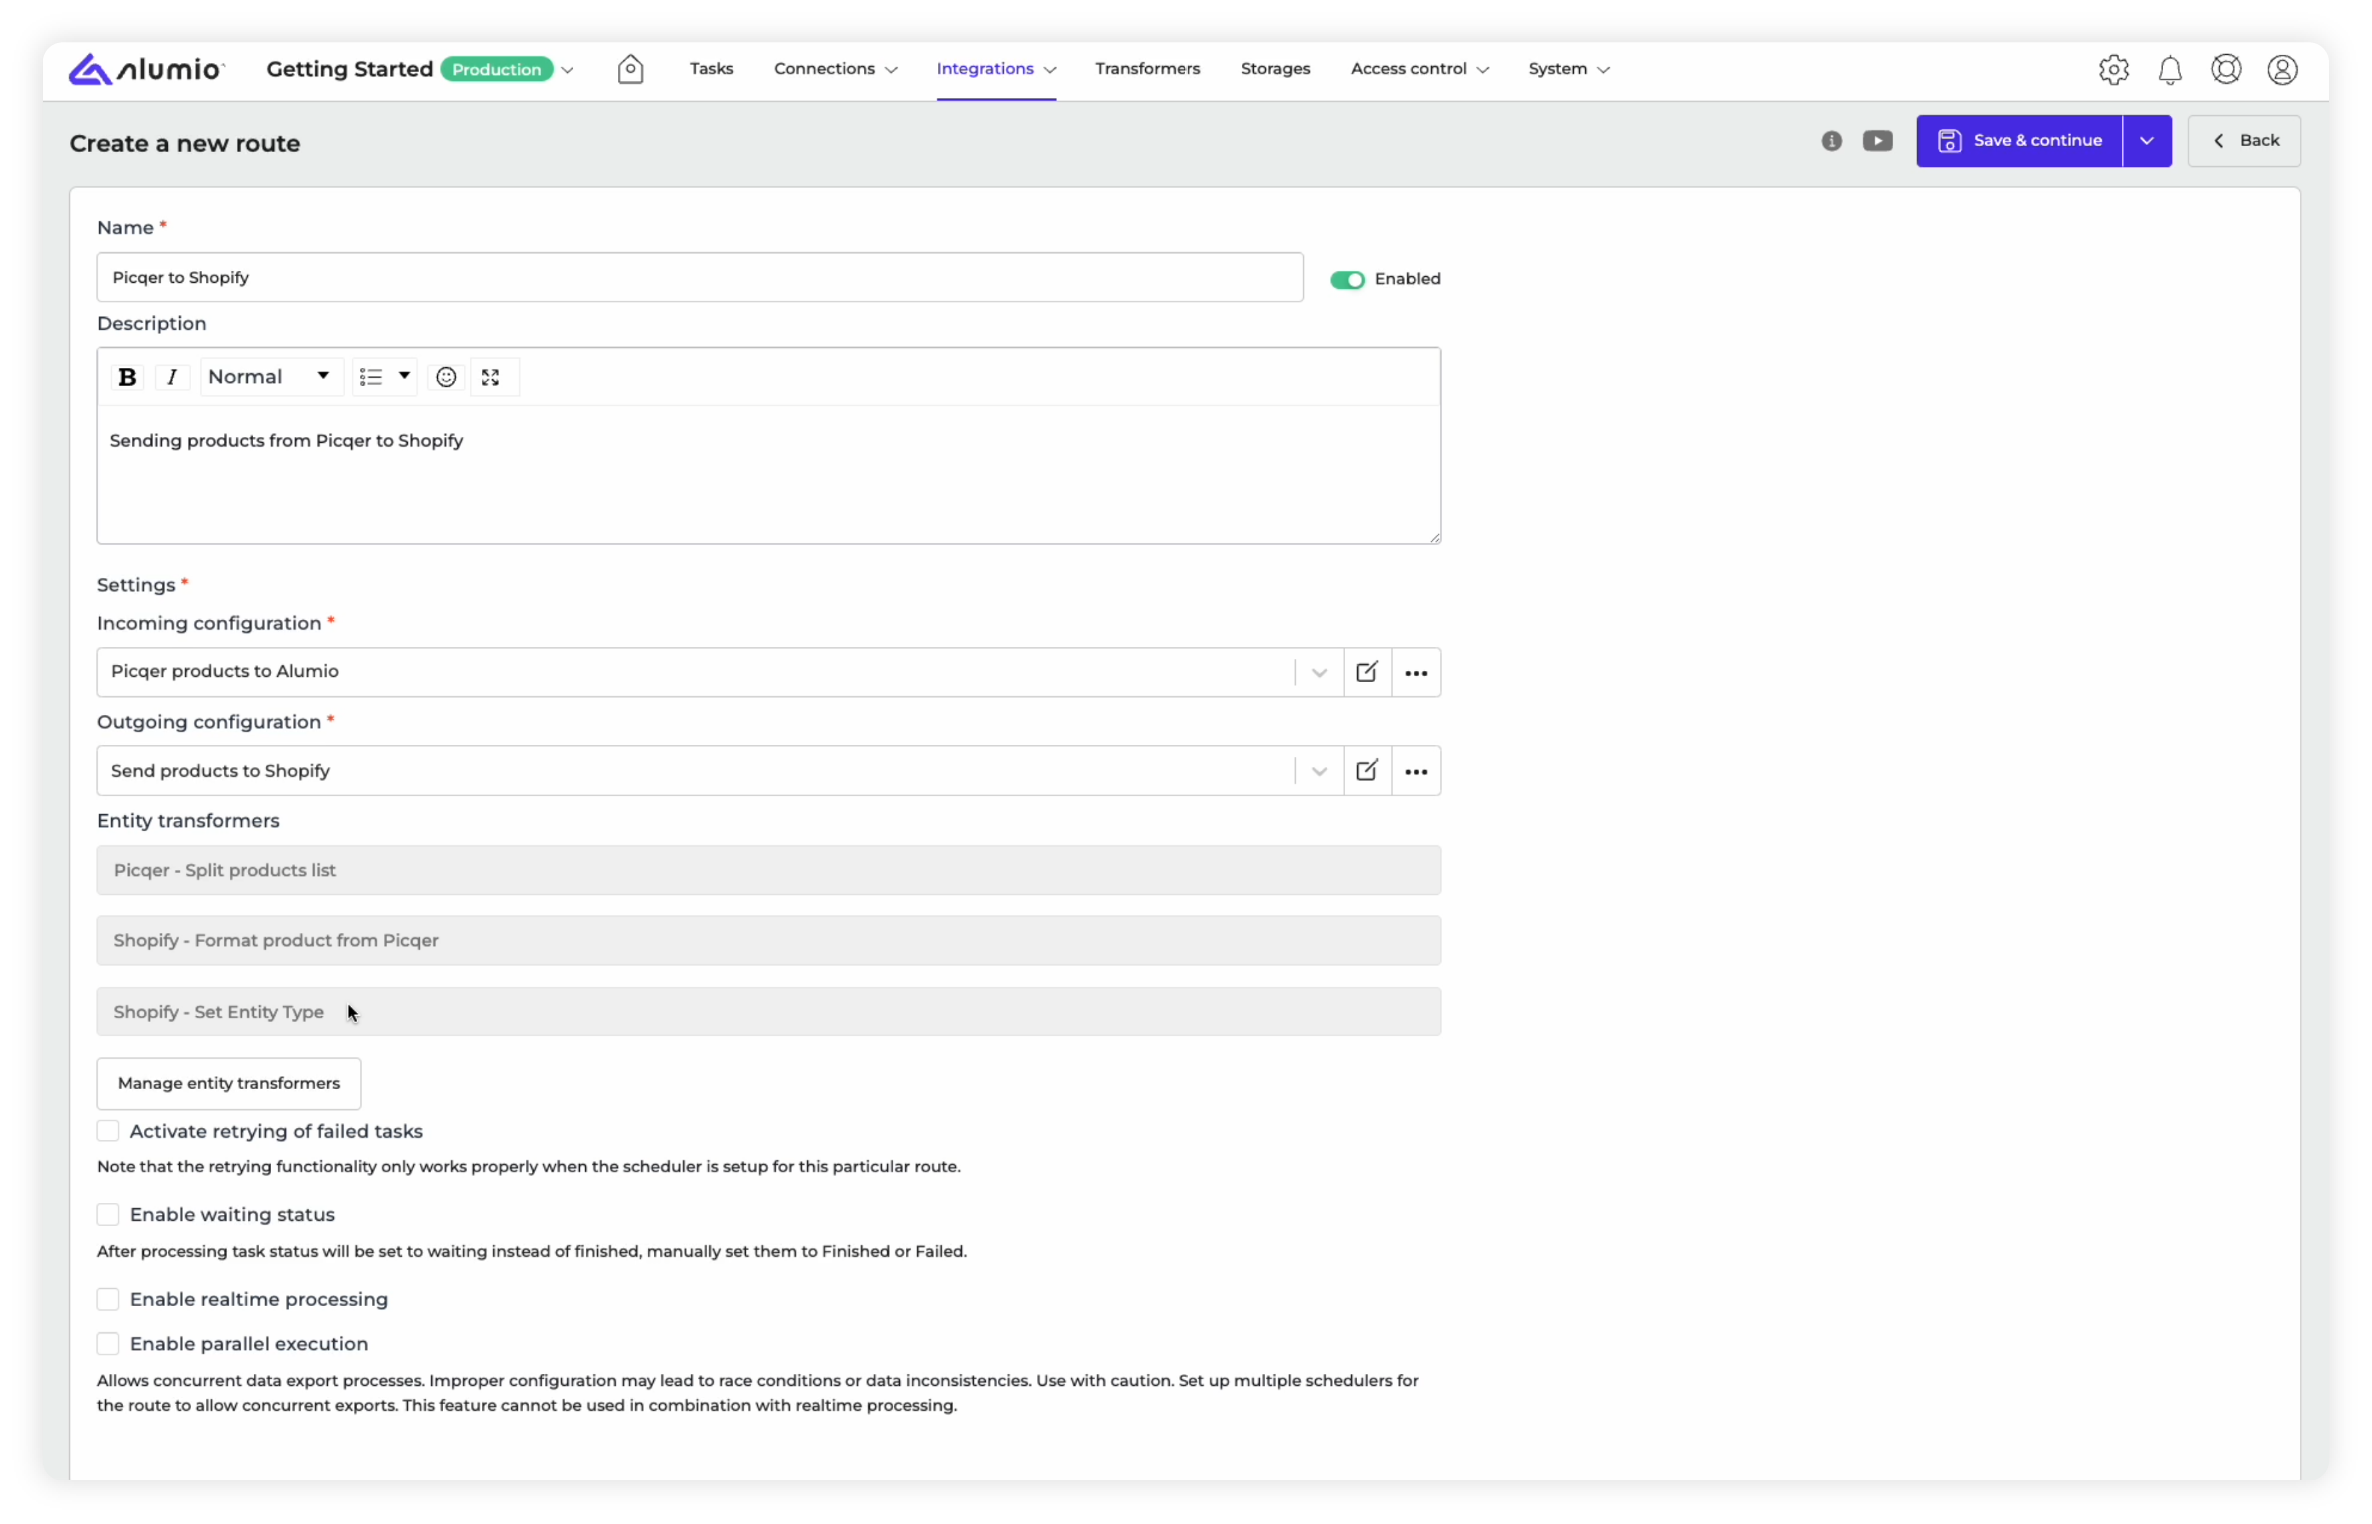
8. Transforming the Route: Going back to the Route-builder, you will now see that all the Transformers you’ve applied will now show as attached to the Route.
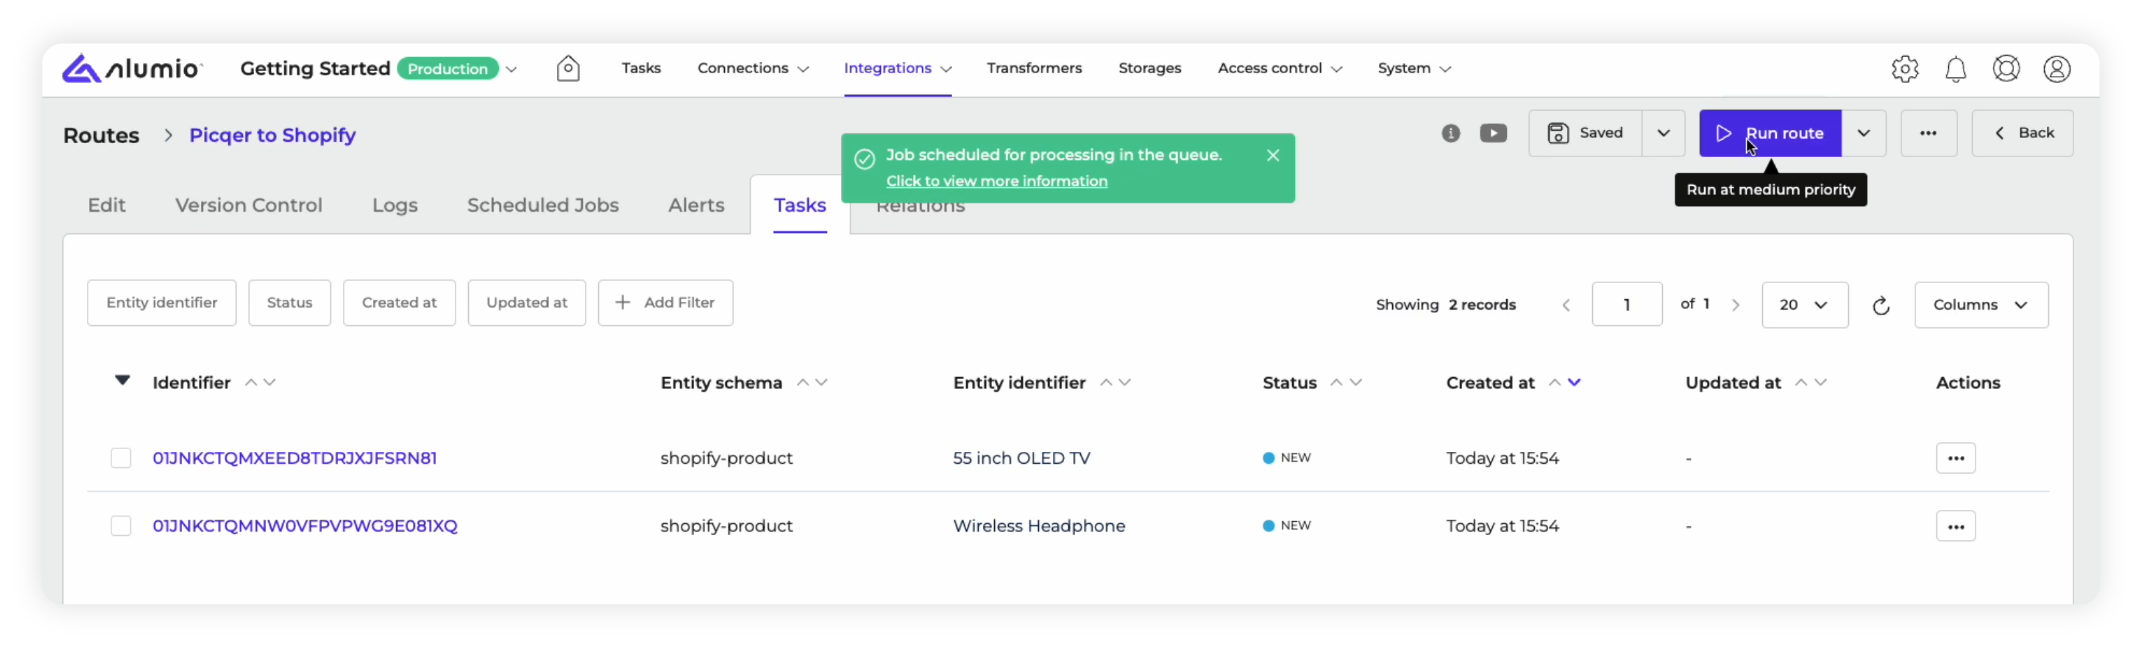
9. Running the Route: As we explained in our previous lesson about setting up a basic integration, you need to follow the same steps to run the Route. By clicking the “Run Route” button at the top right of the Route-builder, the Route will also run the Transformers applied along with the Incoming and Outgoing Configuration.
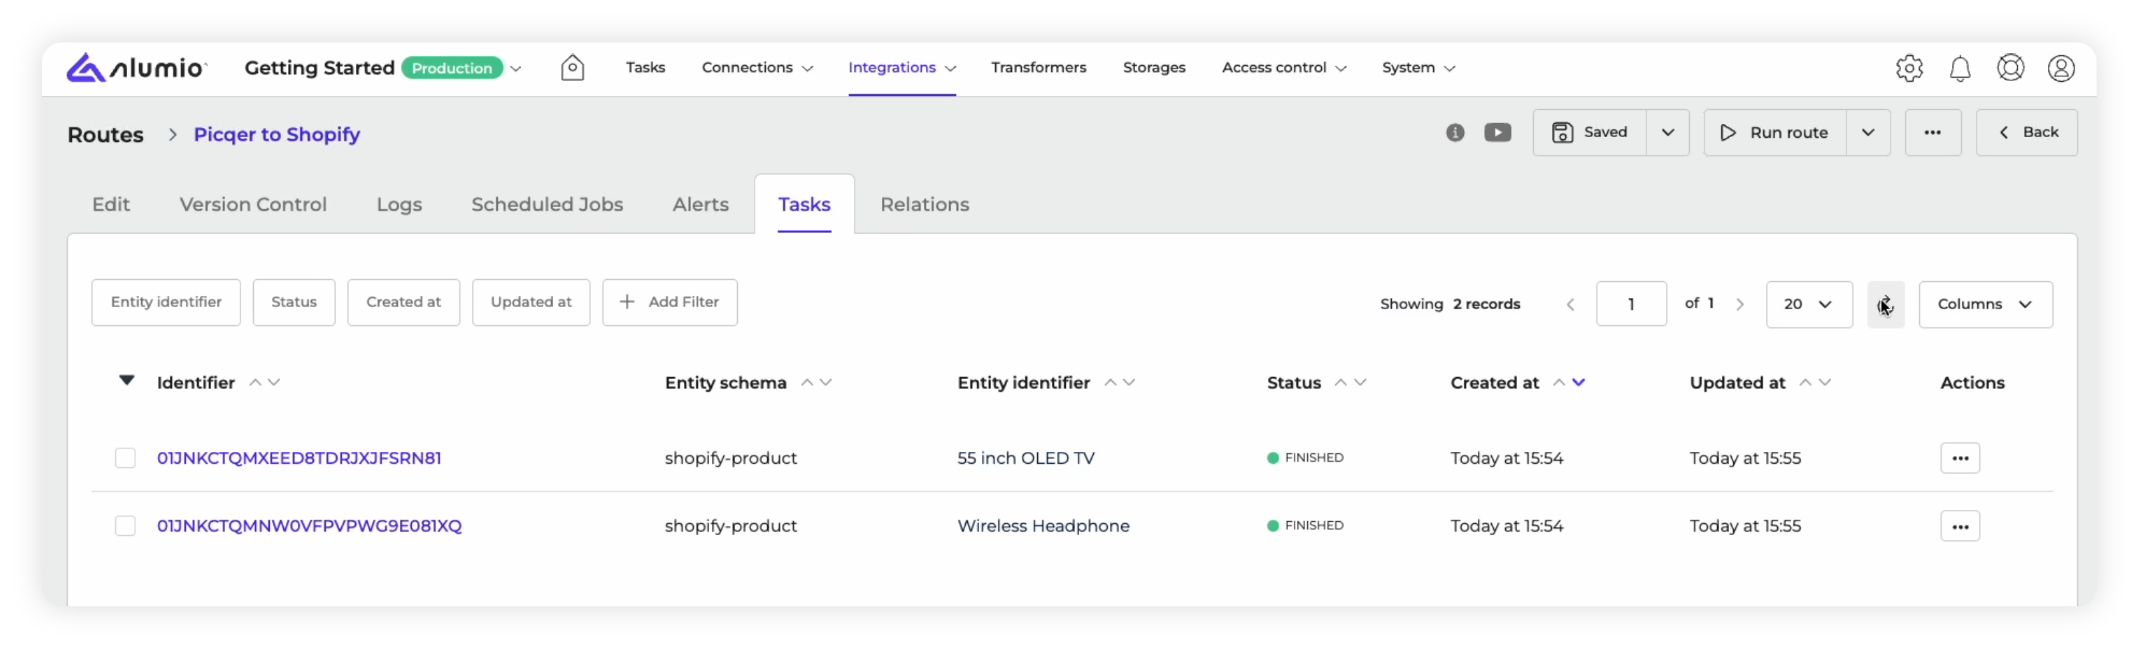
10. Finishing the integration: If running the Route results in “Finished Tasks” instead of “Failed Tasks, it would mean that your Route and the Transformers applied are working correctly.
11. Checking the logs: Next, as mentioned in the previous lesson, you can choose to view the “Logs” tabs within the Route-builder.
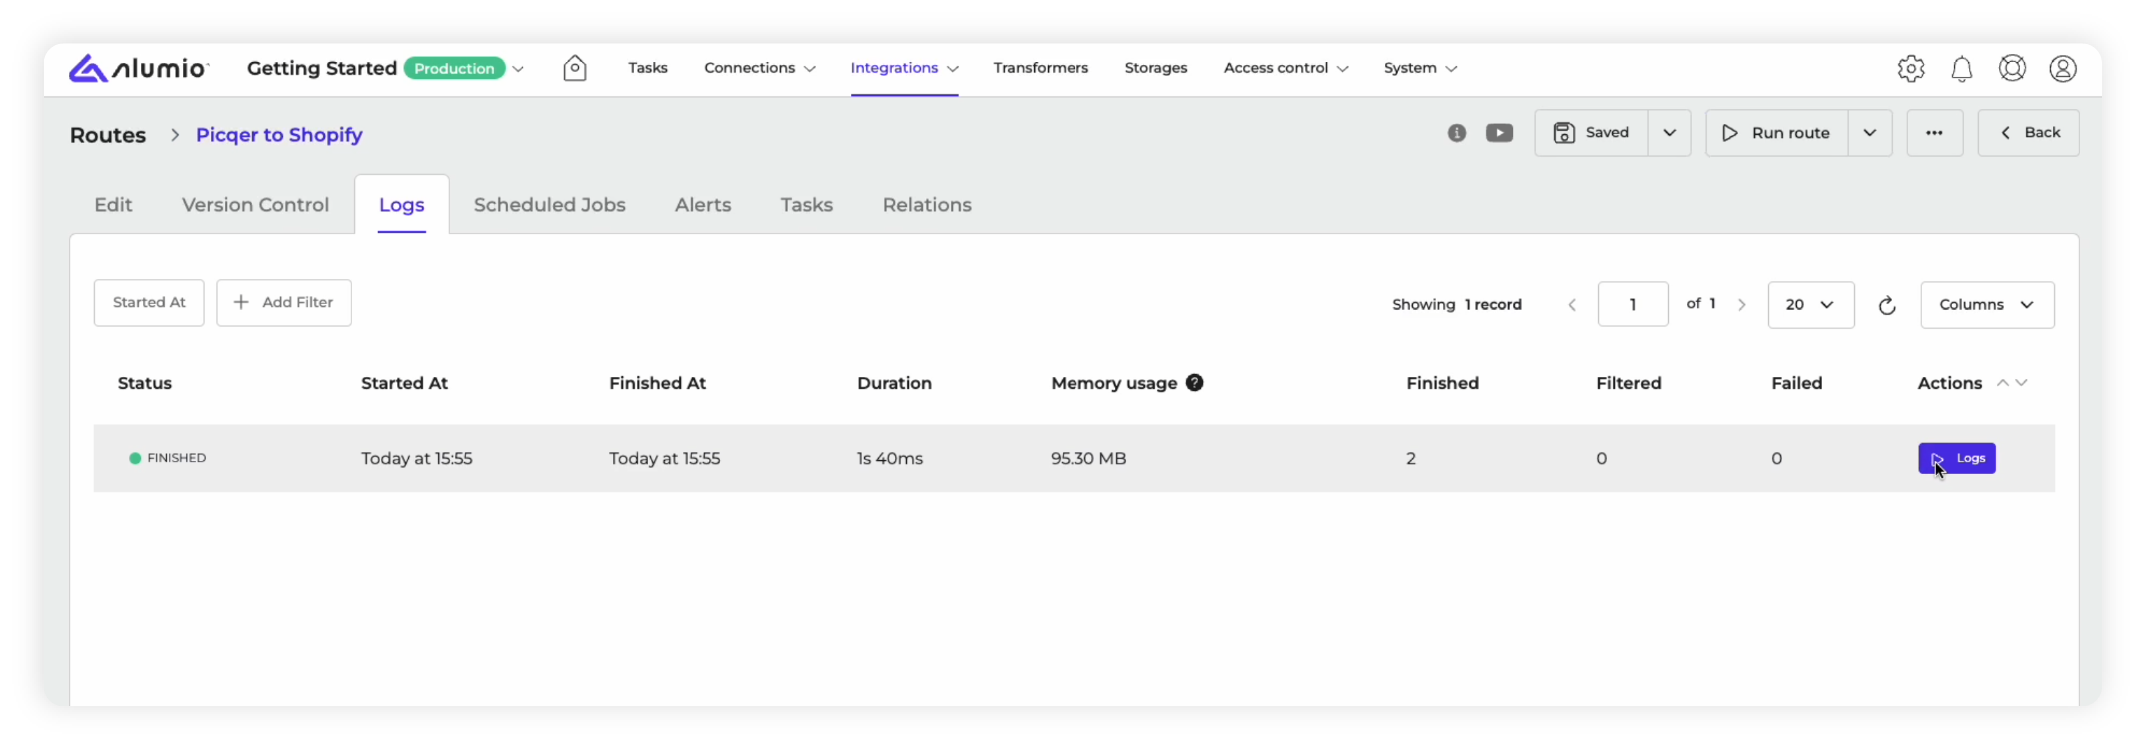
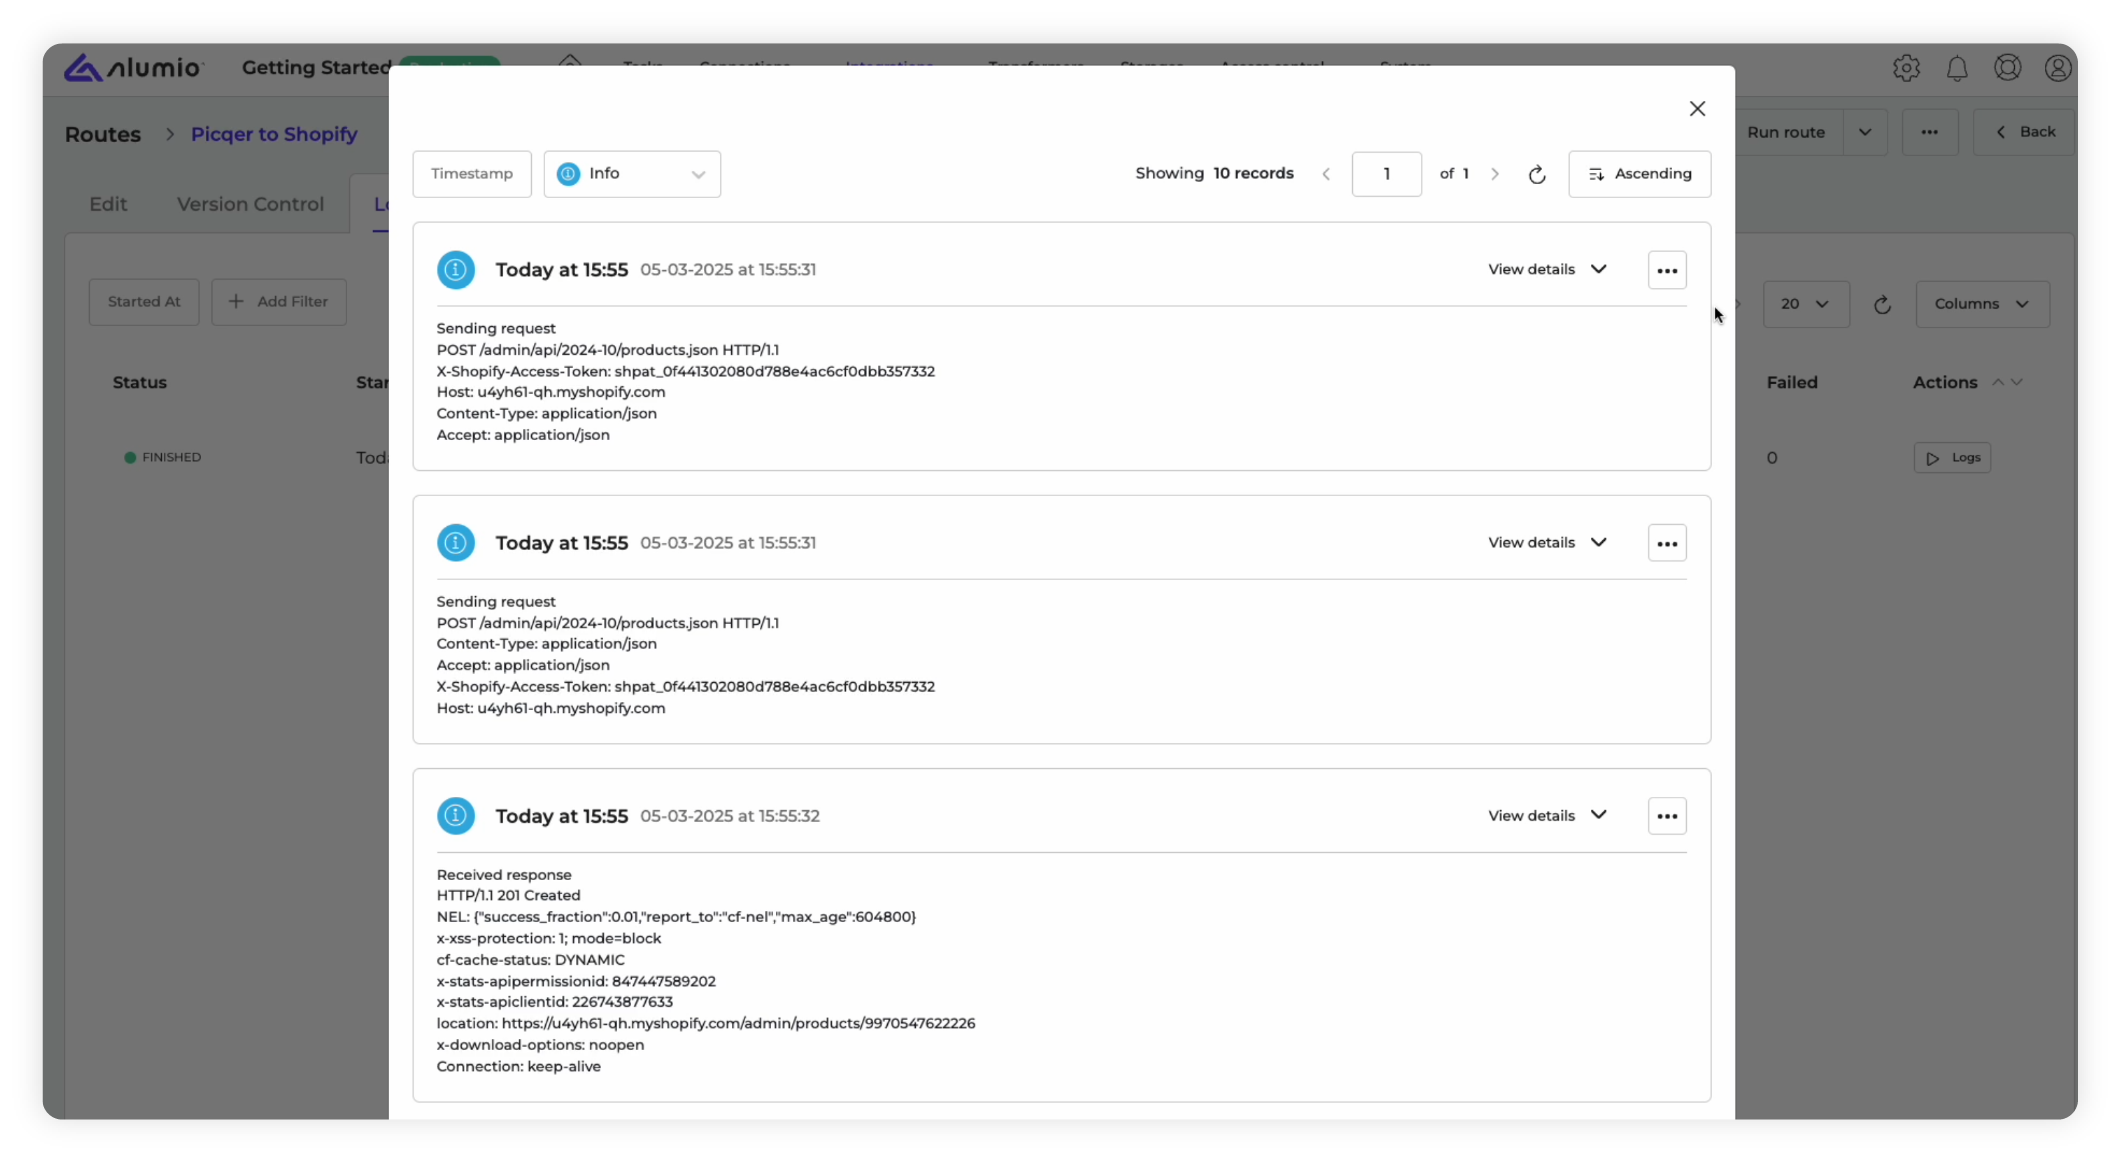
12. Cross-verify details: By choosing to see the Logs for the new Finished Tasks you’ve generated via the Route, you will be able to see a detailed action report about your integration.
This concludes a basic explanation of how you can apply Transformers to your integrations in Alumio. It’s important to understand that in this course we’ve shown the most elementary forms of using Transformers. They can be used more broadly to build more complex customizations, which will explore in our upcoming courses.
The next important thing to understand about developing and streamlining your integrations with Alumio, apart from building and transforming them, is automating these integrations with our Scheduler.
Step 4: Scheduling and automating your integrations
Providing a robust scheduler and queueing mechanism, Alumio allows you to intelligently schedule your integrations by determining the timing and frequency of your integrations. Let us finally explore how to schedule the integration from Picqer to Shopify that we’ve now built and transformed in this walkthrough.
Here’s how you can start scheduling and automating your integrations in a flexible way:
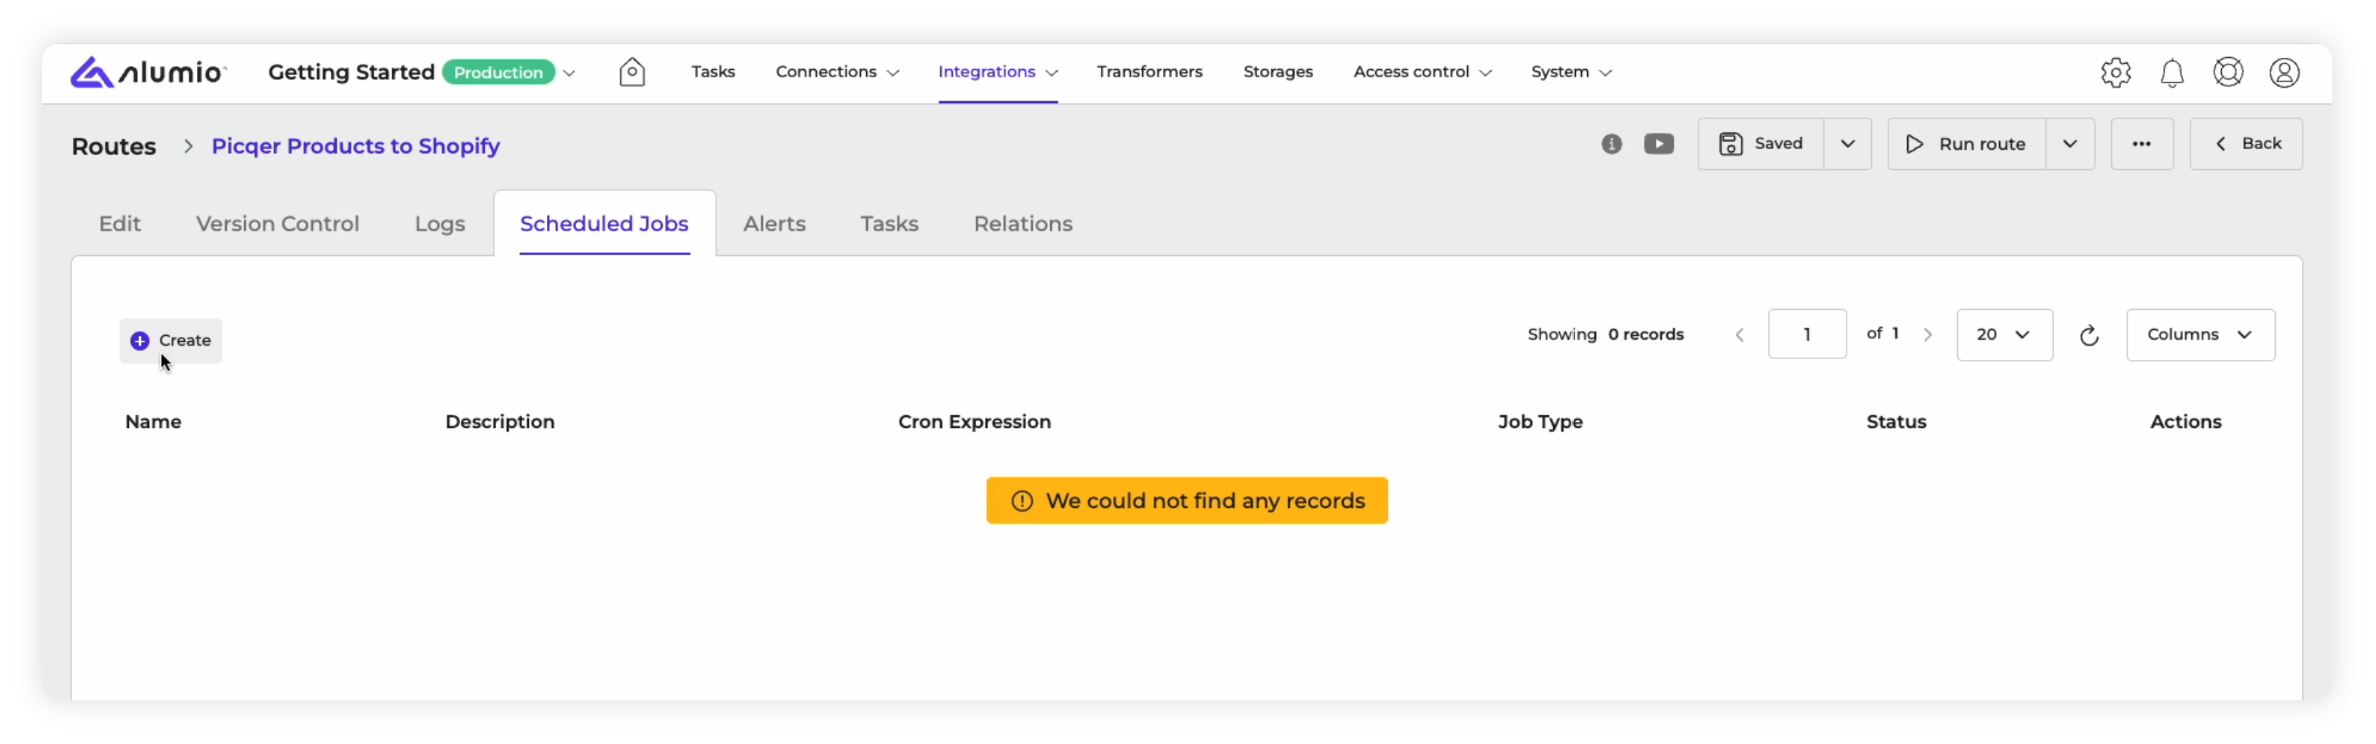
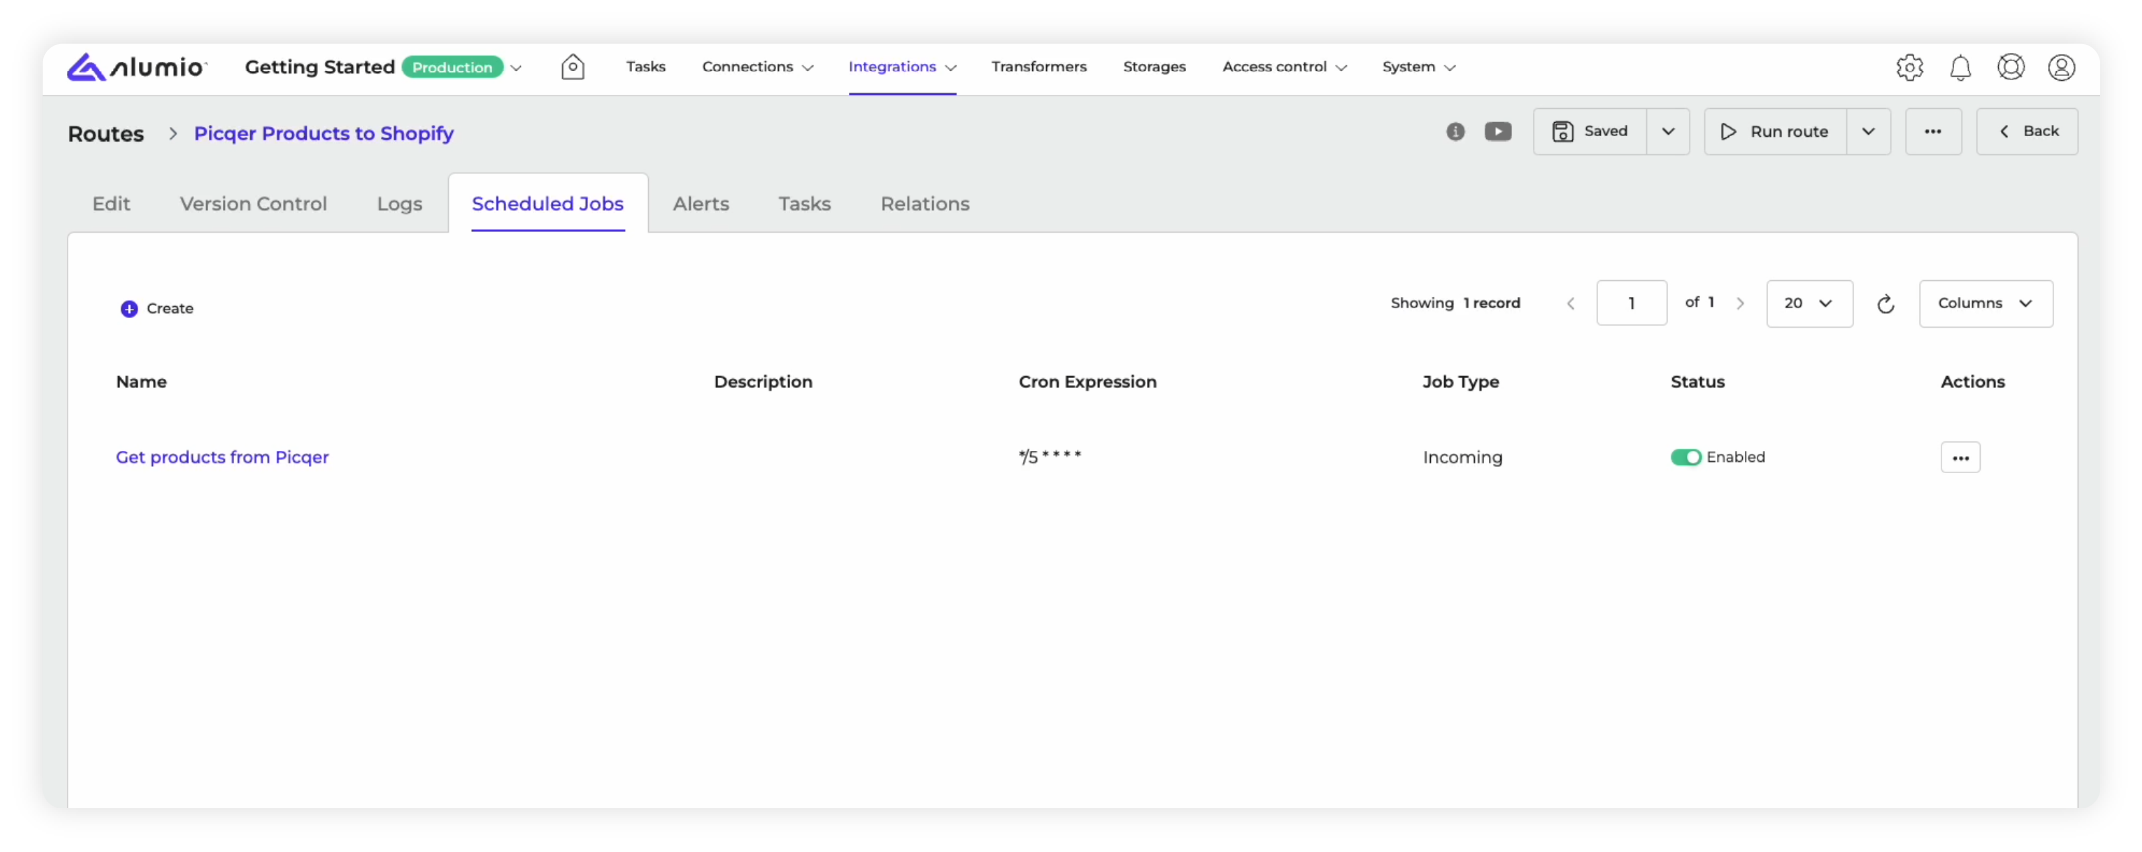
1. Scheduled Jobs: Within the Route-builder that you’ve configured, transformed, and saved, you can automate your integrations by selecting the “Scheduled Jobs” tab.
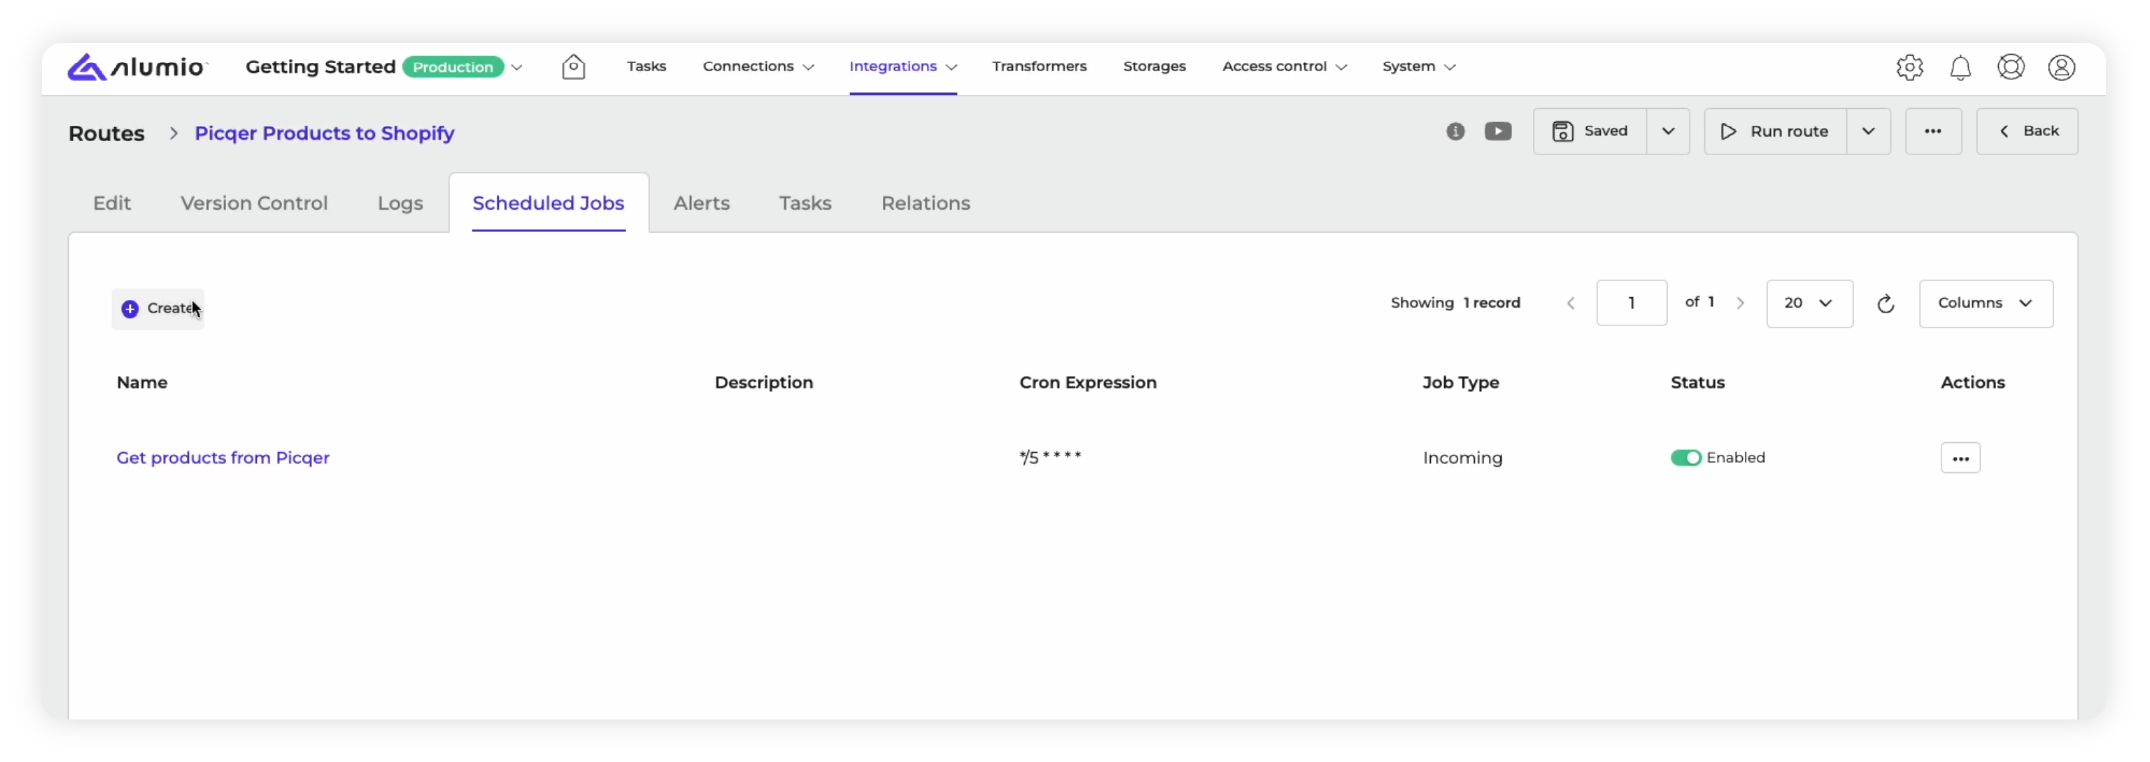
2. Create a new schedule: Within the “Scheduled Jobs” tab, you can click on the “+ Create” button on the top left in order to start scheduling your integration.
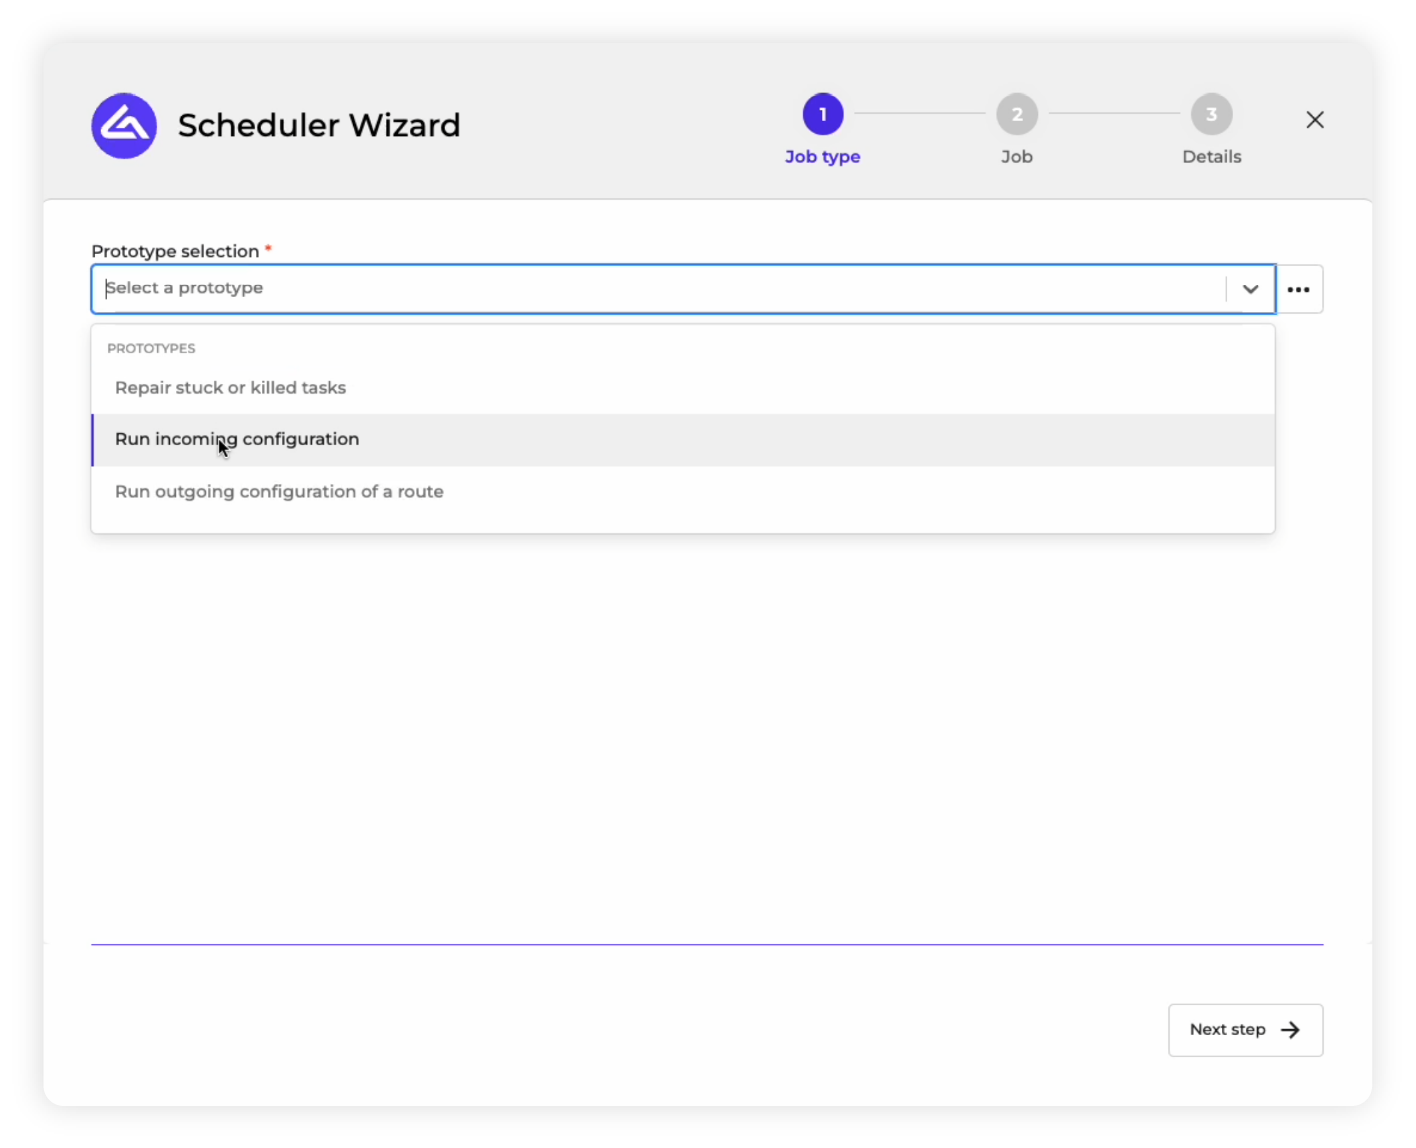
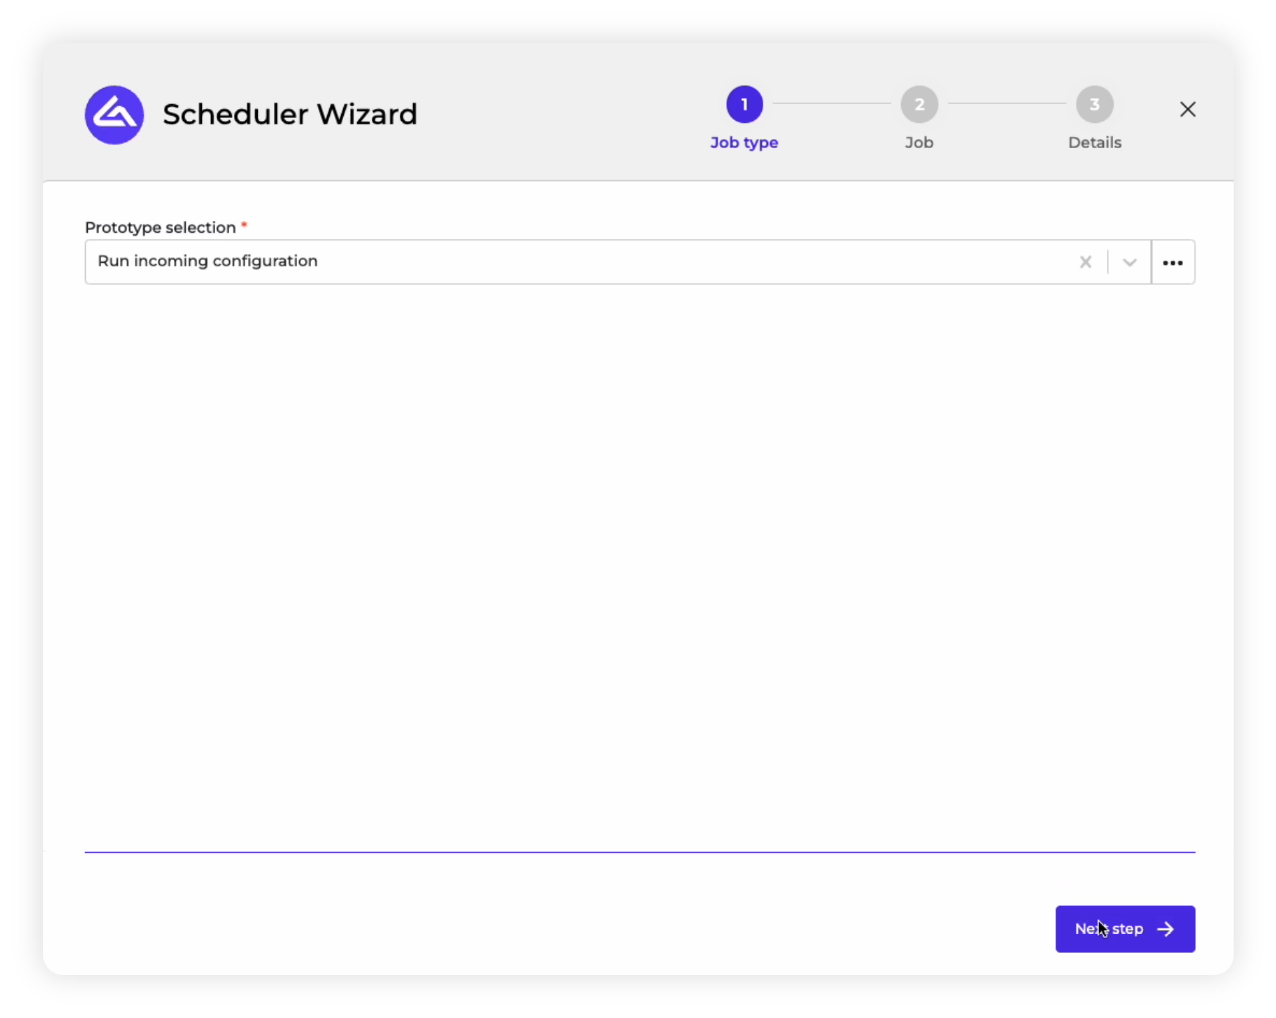
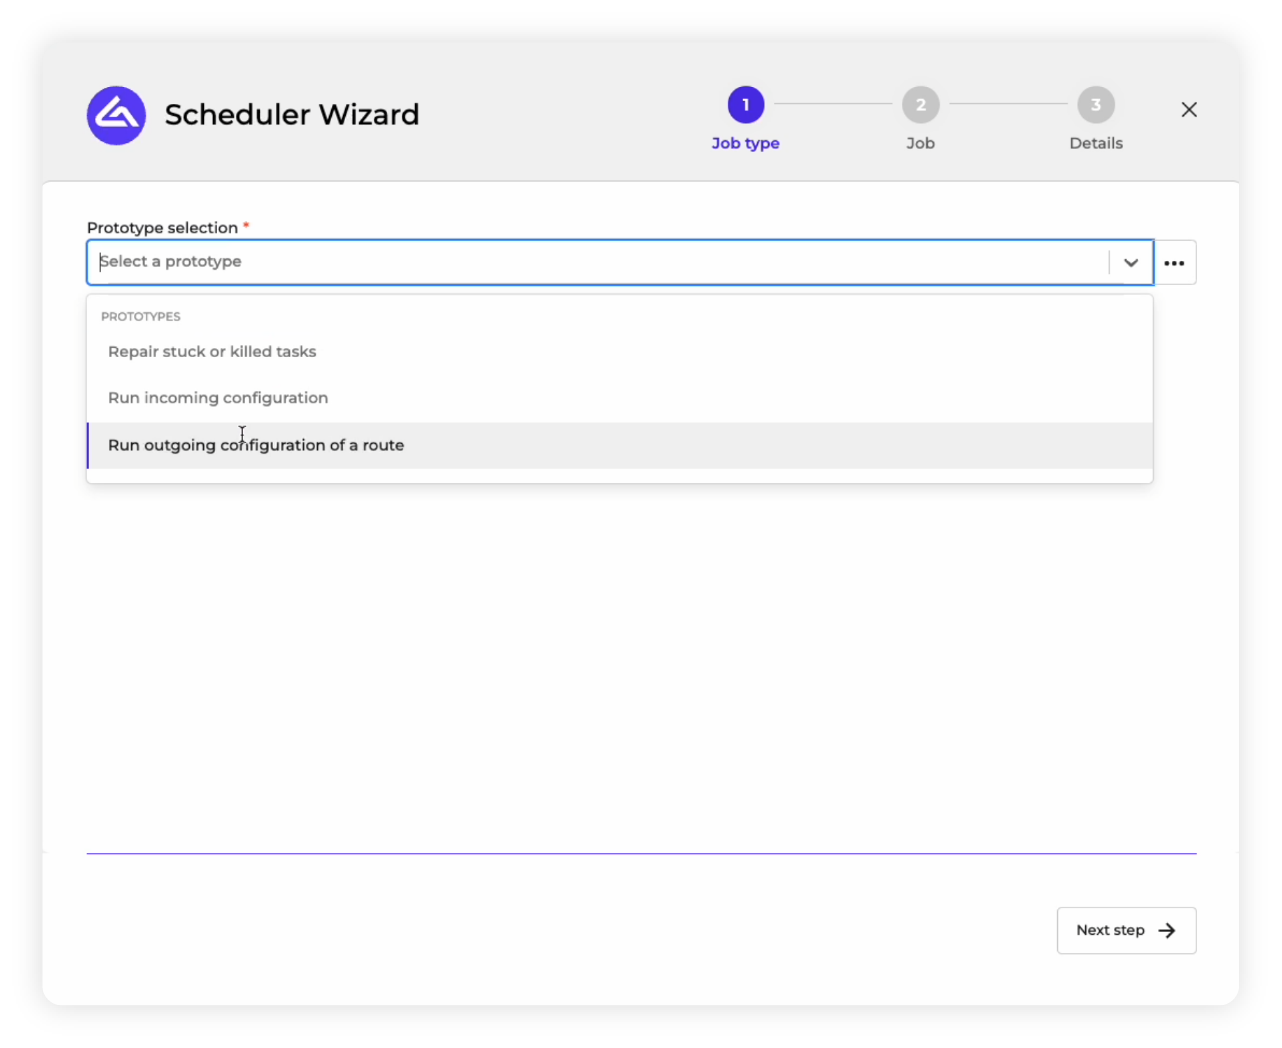
3. Build an Incoming schedule: The Scheduler wizard that pops up will give you a “Prototype Selection” drop-down menu. This allows you to choose the type of scheduler you need. We will choose the “Run Incoming Configuration” option.
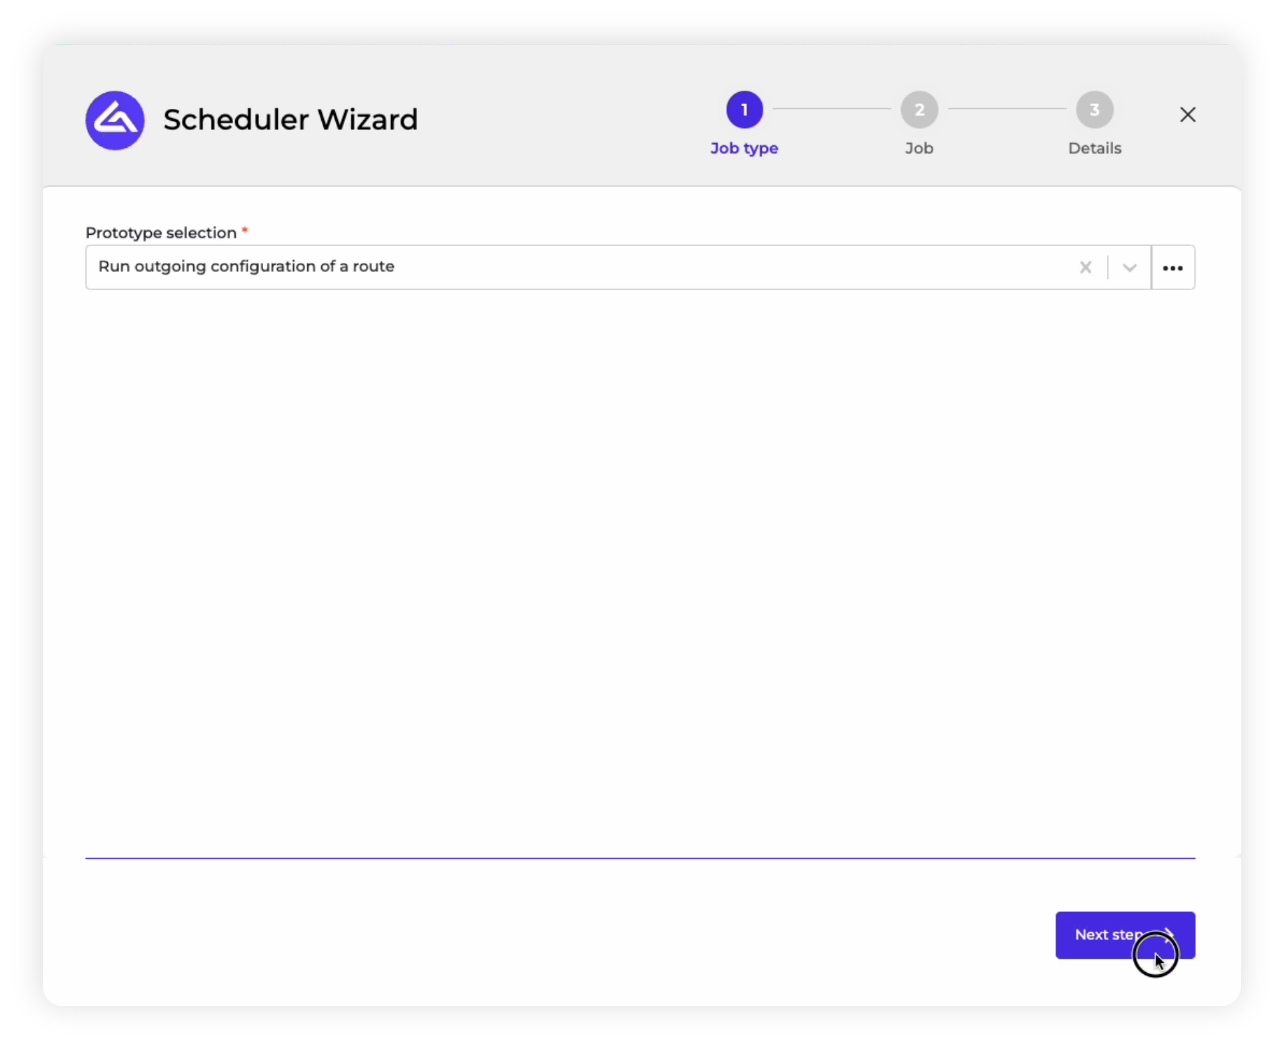
4. Next step: After selecting a scheduling prototype, you need to click on the “Next Step” button at the bottom right of the interface.
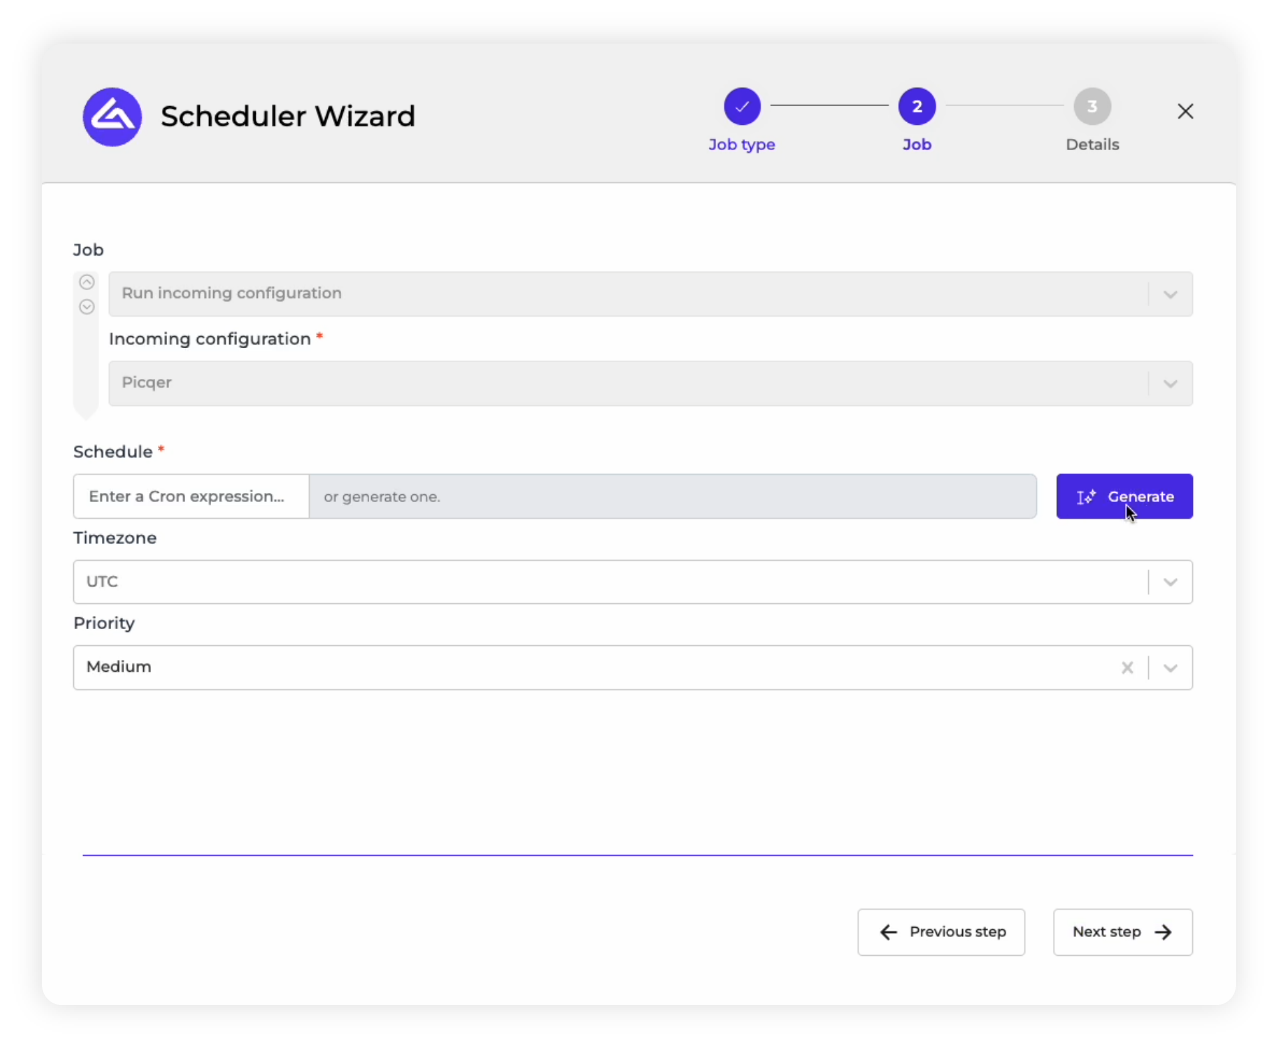
5. Configuring your Scheduler: We’ve chosen to schedule our “Incoming Configuration” that fetches data from Picqer, as demonstrated by the visual below. To set a scheduled time and frequency, you need to either enter a cron expression in the “Schedule” field, or you can click the “Generate” button to allow our AI schedule generator to create it for you.
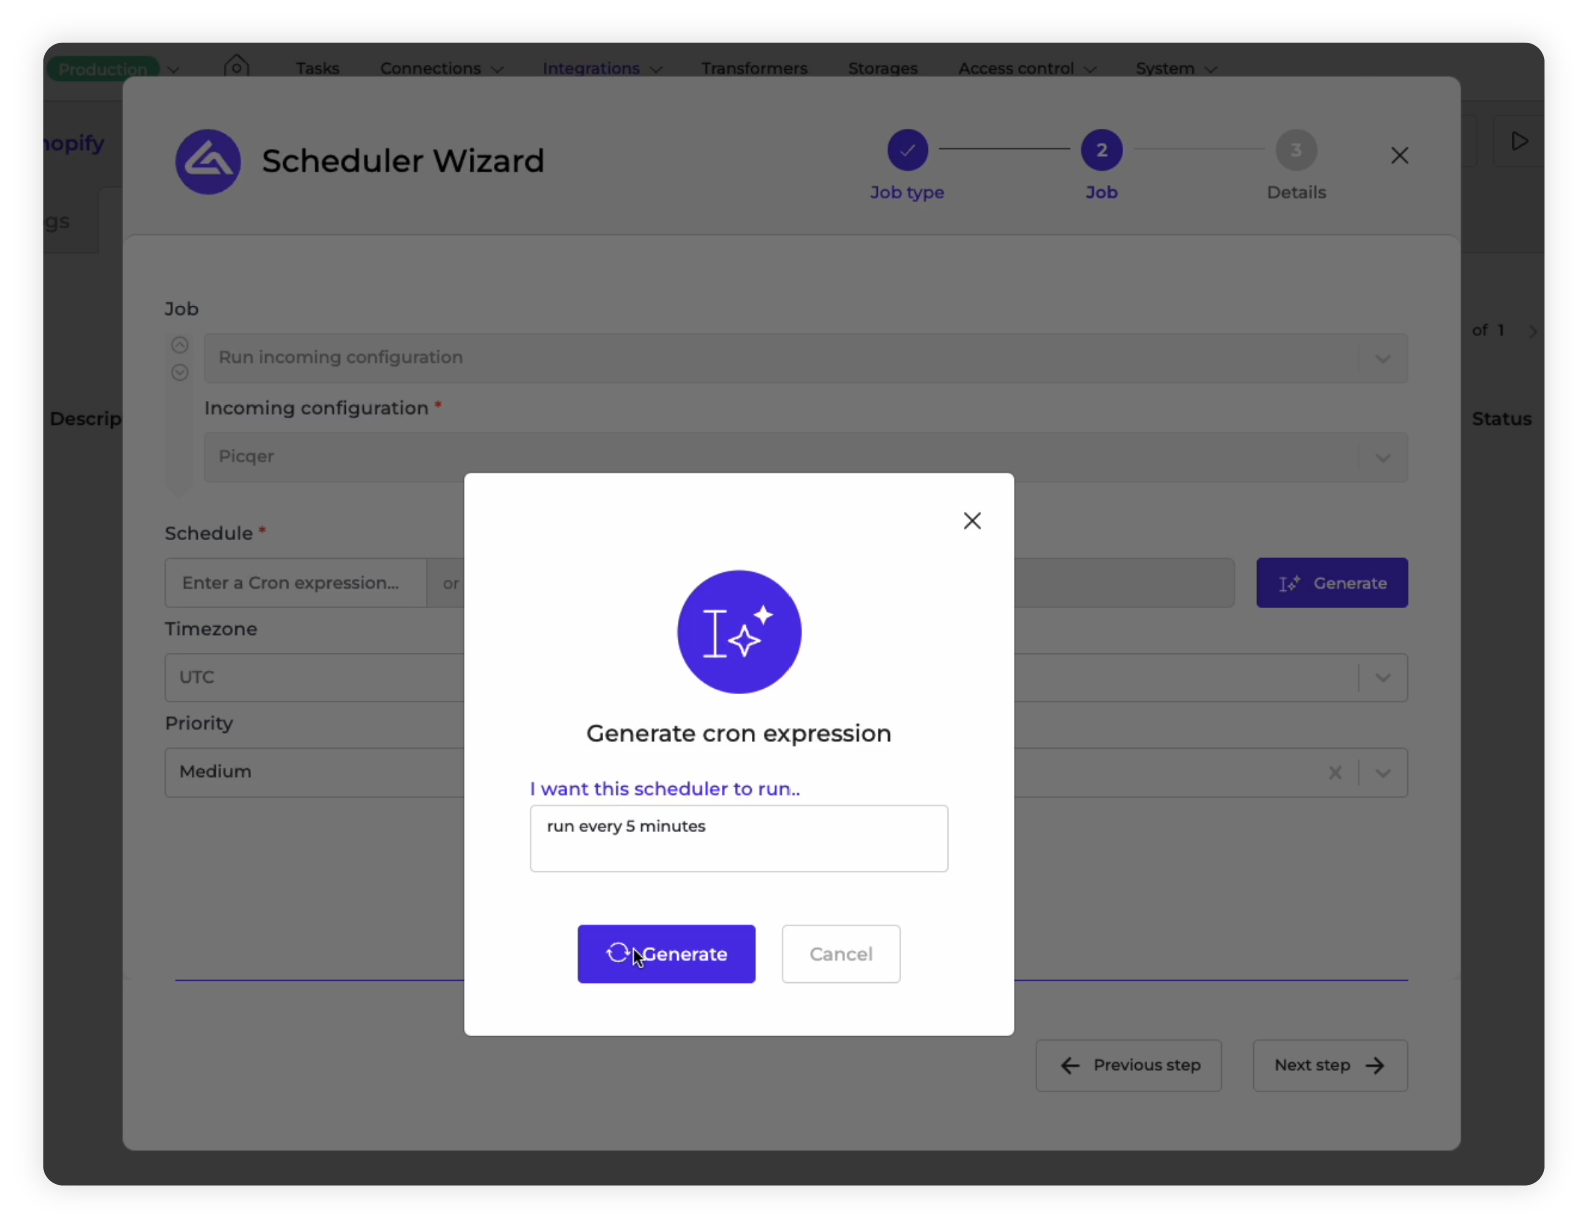
6. Generate a cron expression: Within the generator that pops up, you can enter a time schedule in natural language and click “Generate,” and it will create a cron expression based on your prompt. So, for example, you can type in the prompt “run every 5 minutes,” and it will generate the appropriate cron expression within the Schedule field.
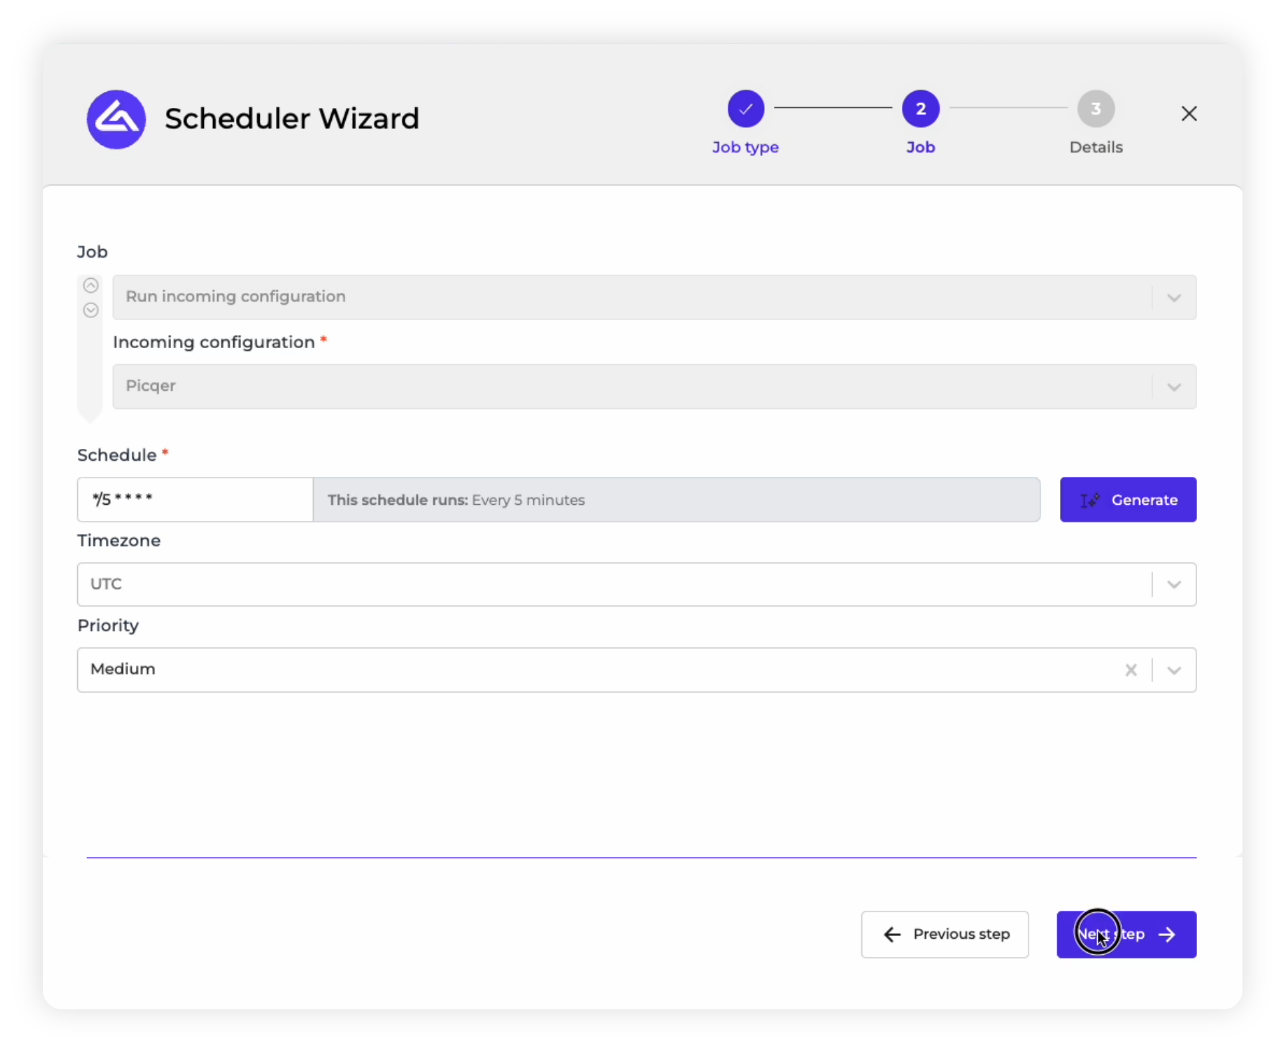
7. Complete the schedule details: Apart from having a cron expression generated within the Schedule, you can also optionally choose to enter a timezone and a priority. The priority will determine in what order the Scheduler is processed through Alumio’s queuing mechanism. After you’ve finalized these details, you need to click on “Next Step” to finalize the Scheduler.
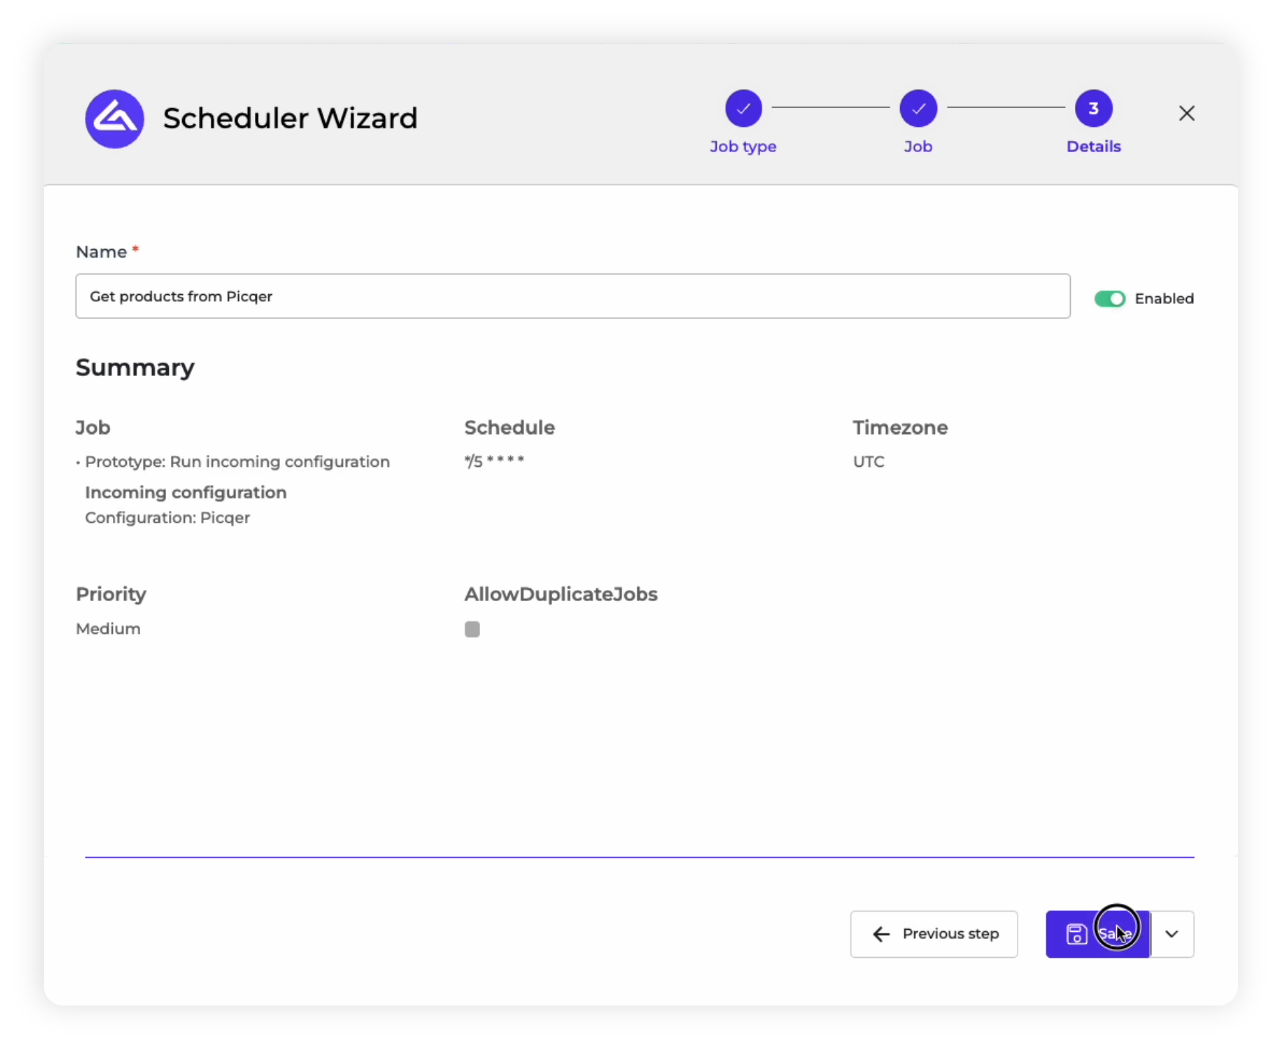
8. Name your Scheduler: Give the Scheduler a contextual name so that you can later easily find it in the Queue, when you have many Schedulers running at the same time. Since this particular Incoming Scheduler is set to fetch product data from Picqer every 5 minutes, we will name it “Get products from Picqer”. In order to complete the Scheduler, we need to click the “Save” button.
9. Check scheduled jobs: You should now be able to find the new schedule you built called “Get products from Picqer” within the “Scheduled Jobs” section of “Picqer Products to Shopify” Route. You can always check this Schedule, modify, or pause it from this section of your Route.
10. Create a new Scheduler: While we’ve scheduled the Incoming Configuration to pull in product data from Picqer every 5 minutes, it’s still only one part of the integration. The other part involves scheduling the Outgoing Configuration as well to complete the integration. In order to do so, we simply have to create a new Schedule from the Scheduled Jobs section by clicking “+ Create.”
11. Build an Outgoing Schedule: This time, from the Scheduler wizard that pops up, we will have to use the “Prototype Selection” drop-down menu to choose the “Run Outgoing Configuration” option.
12. Next step: After selecting the scheduling prototype, you need to click on the “Next Step” button at the bottom right of the interface.
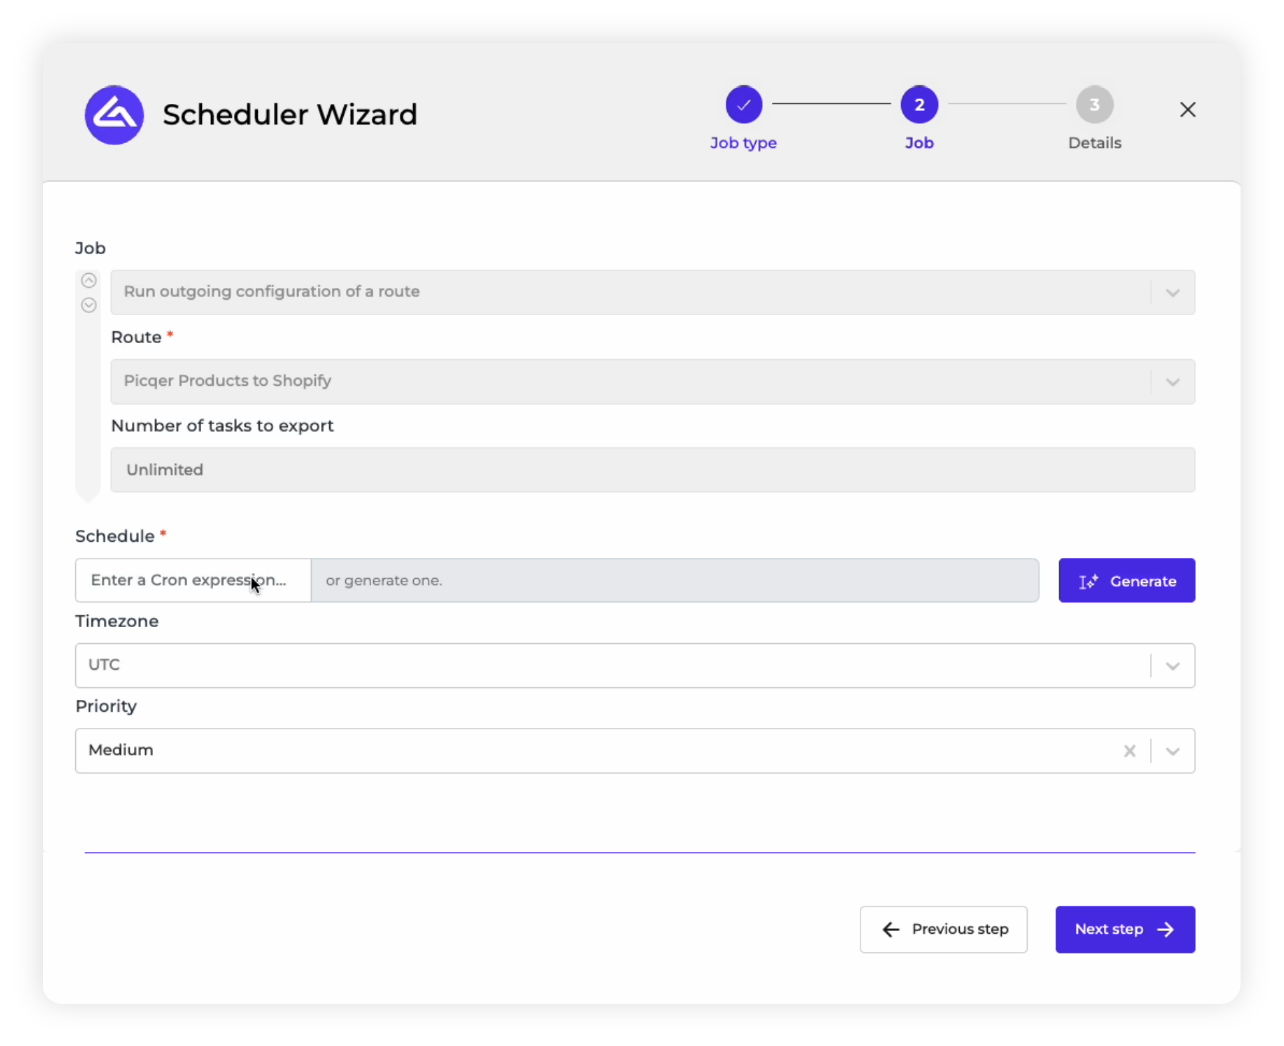
13. Configuring your scheduler: We now have to schedule the “Outgoing Configuration,” where the product data from Picqer will be delivered (exported) to Shopify via Alumio. To set a scheduled time and frequency, you need to either enter a cron expression in the “Schedule” field, or you can click the “Generate” button to allow our AI schedule generator to create it for you.
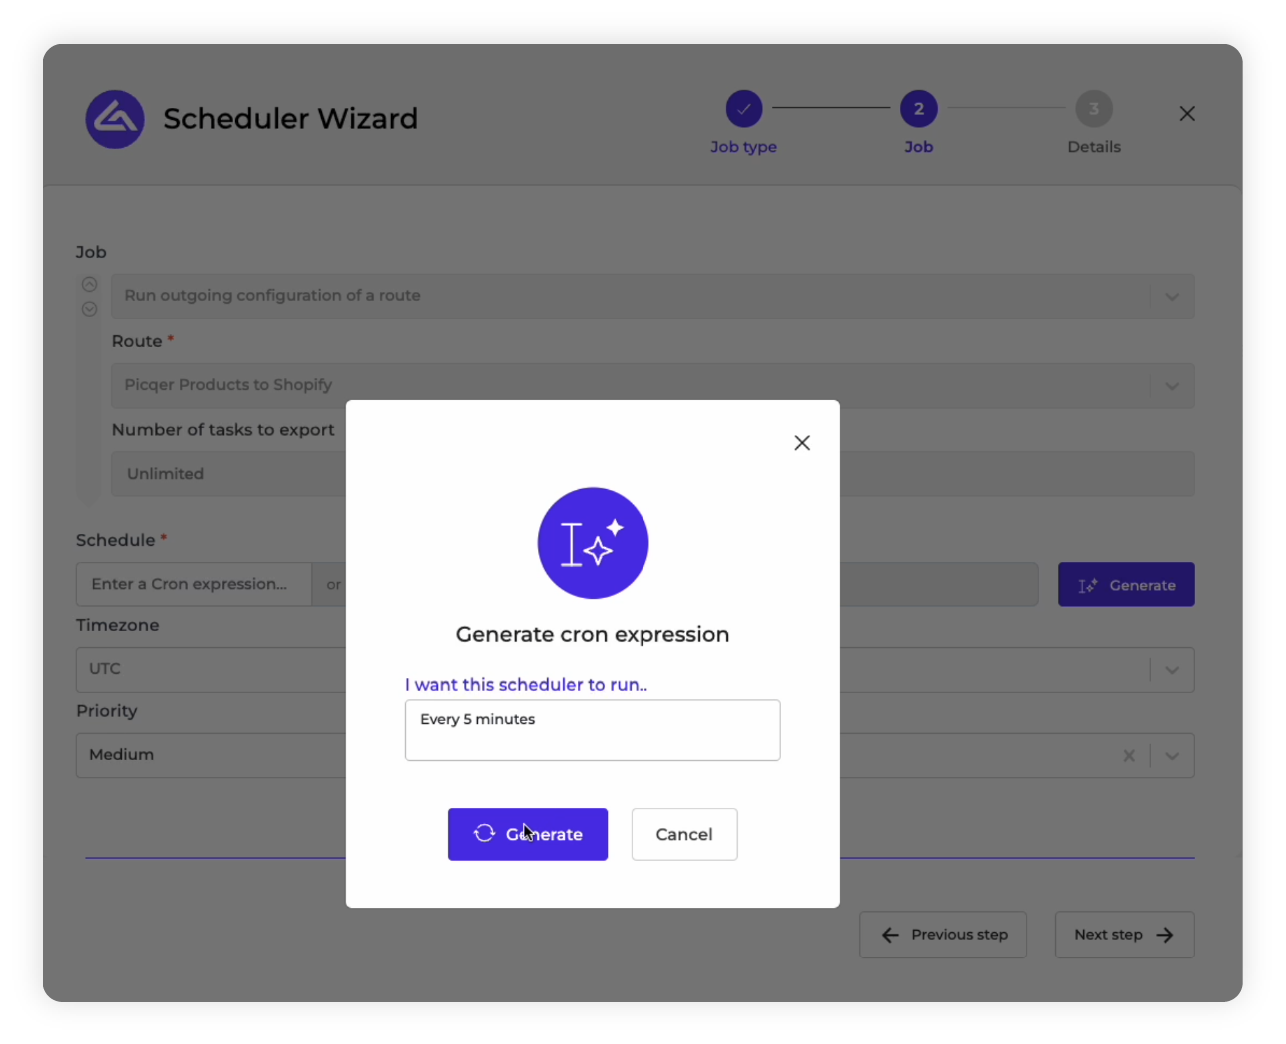
14. Generate a cron expression: Within the generator that pops up, you can simply type in a natural language prompt for when and how frequently you’d like your schedule to run, and click “Generate.” It will create a cron expression based on your prompt. For instance, you can type in the prompt “run every 5 minutes” and it will generate the appropriate cron expression within the Schedule field.
15. Complete the schedule details: Apart from having a cron expression generated within the Schedule, you can also optionally choose to enter a timezone and a priority. The priority will determine in what order the Scheduler is processed through Alumio’s queuing mechanism. After you’ve finalized these details, you need to click on “Next Step” to finalize the Scheduler.

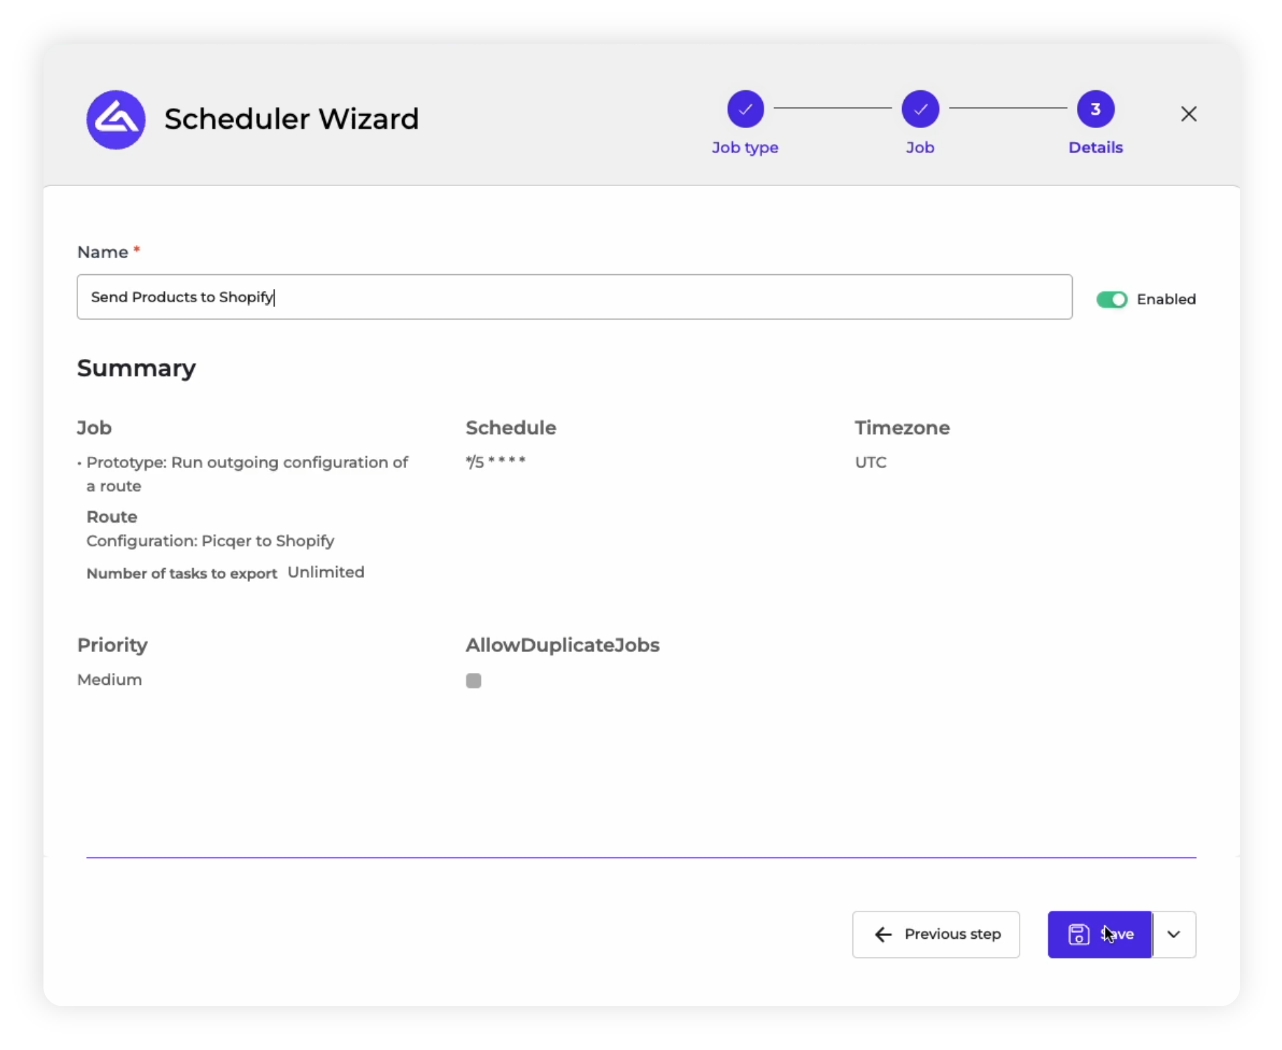
16. Name your scheduler: Give the Scheduler a contextual name so that you can later easily find it in the Queue, when you have many Schedulers running at the same time. Since this Outgoing schedule is set to send product data to Shopify every 5 minutes, we will name it “Send Product to Shopify.” In order to complete the Scheduler, we need to click the “Save” button.
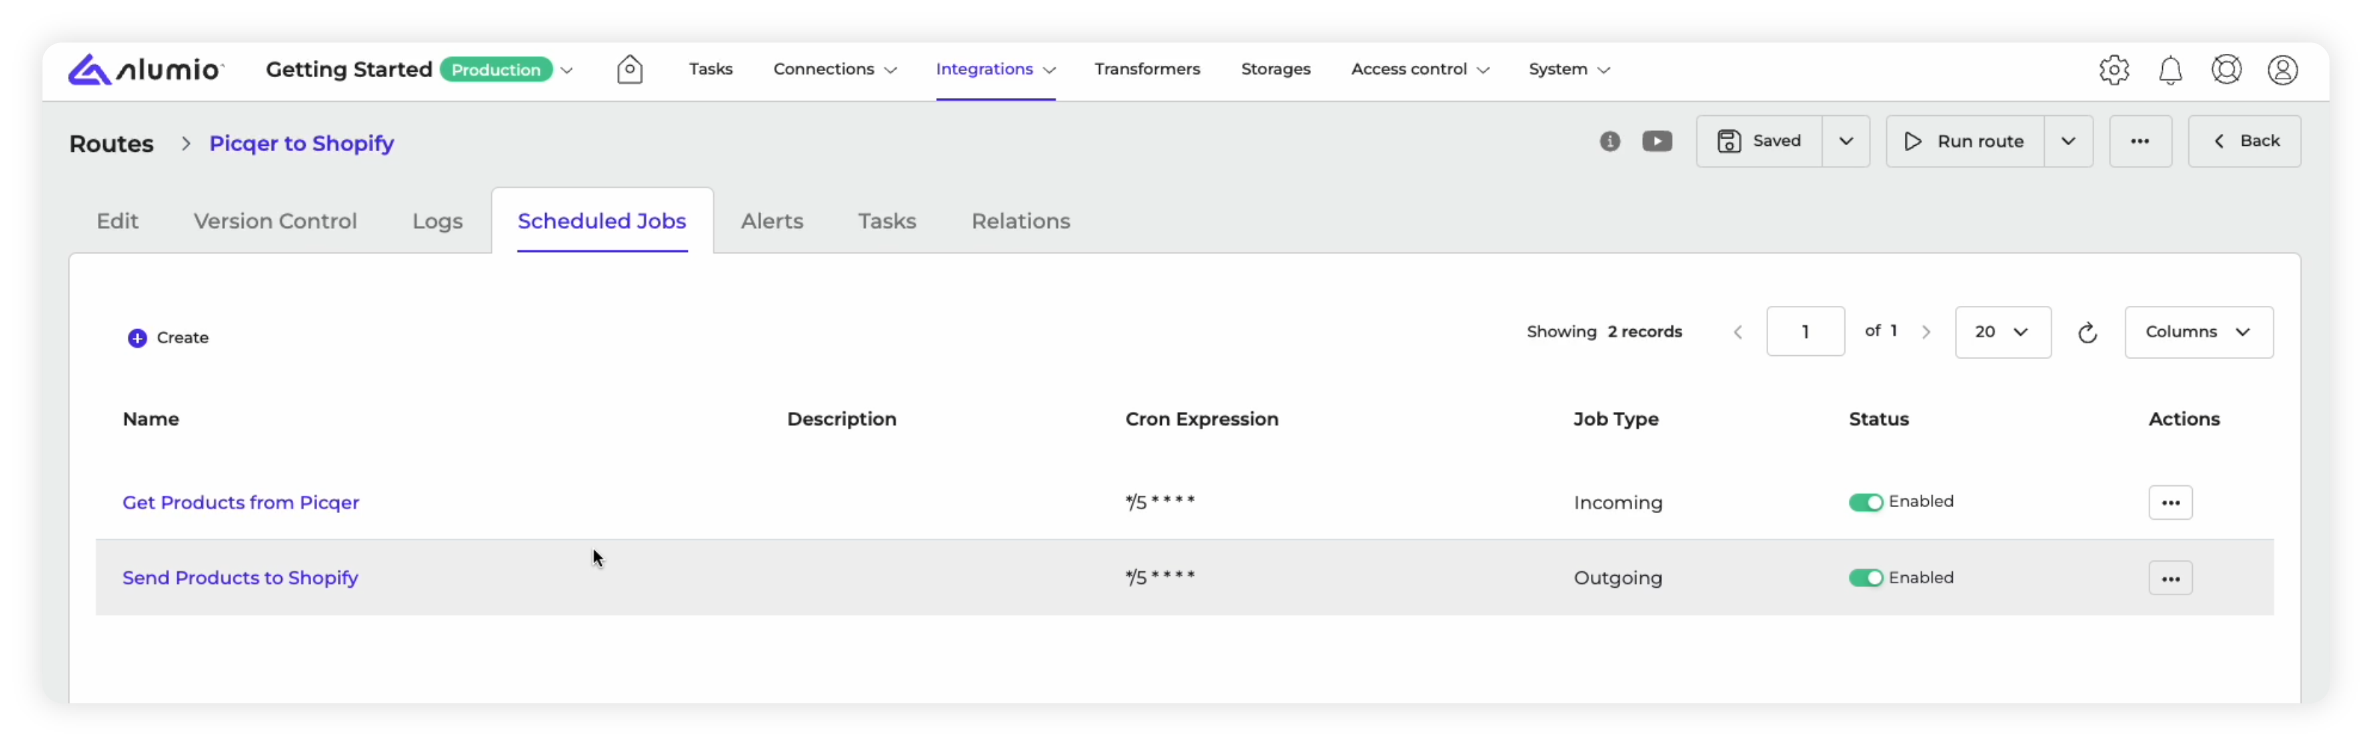
17. Check Scheduled Jobs: You should now be able to find the new Outgoing schedule you built called “Send products to Shopify” within the “Scheduled Jobs” section, along with the Incoming Schedule “Get products from Picqer”. You can always check, modify, or pause these schedules.
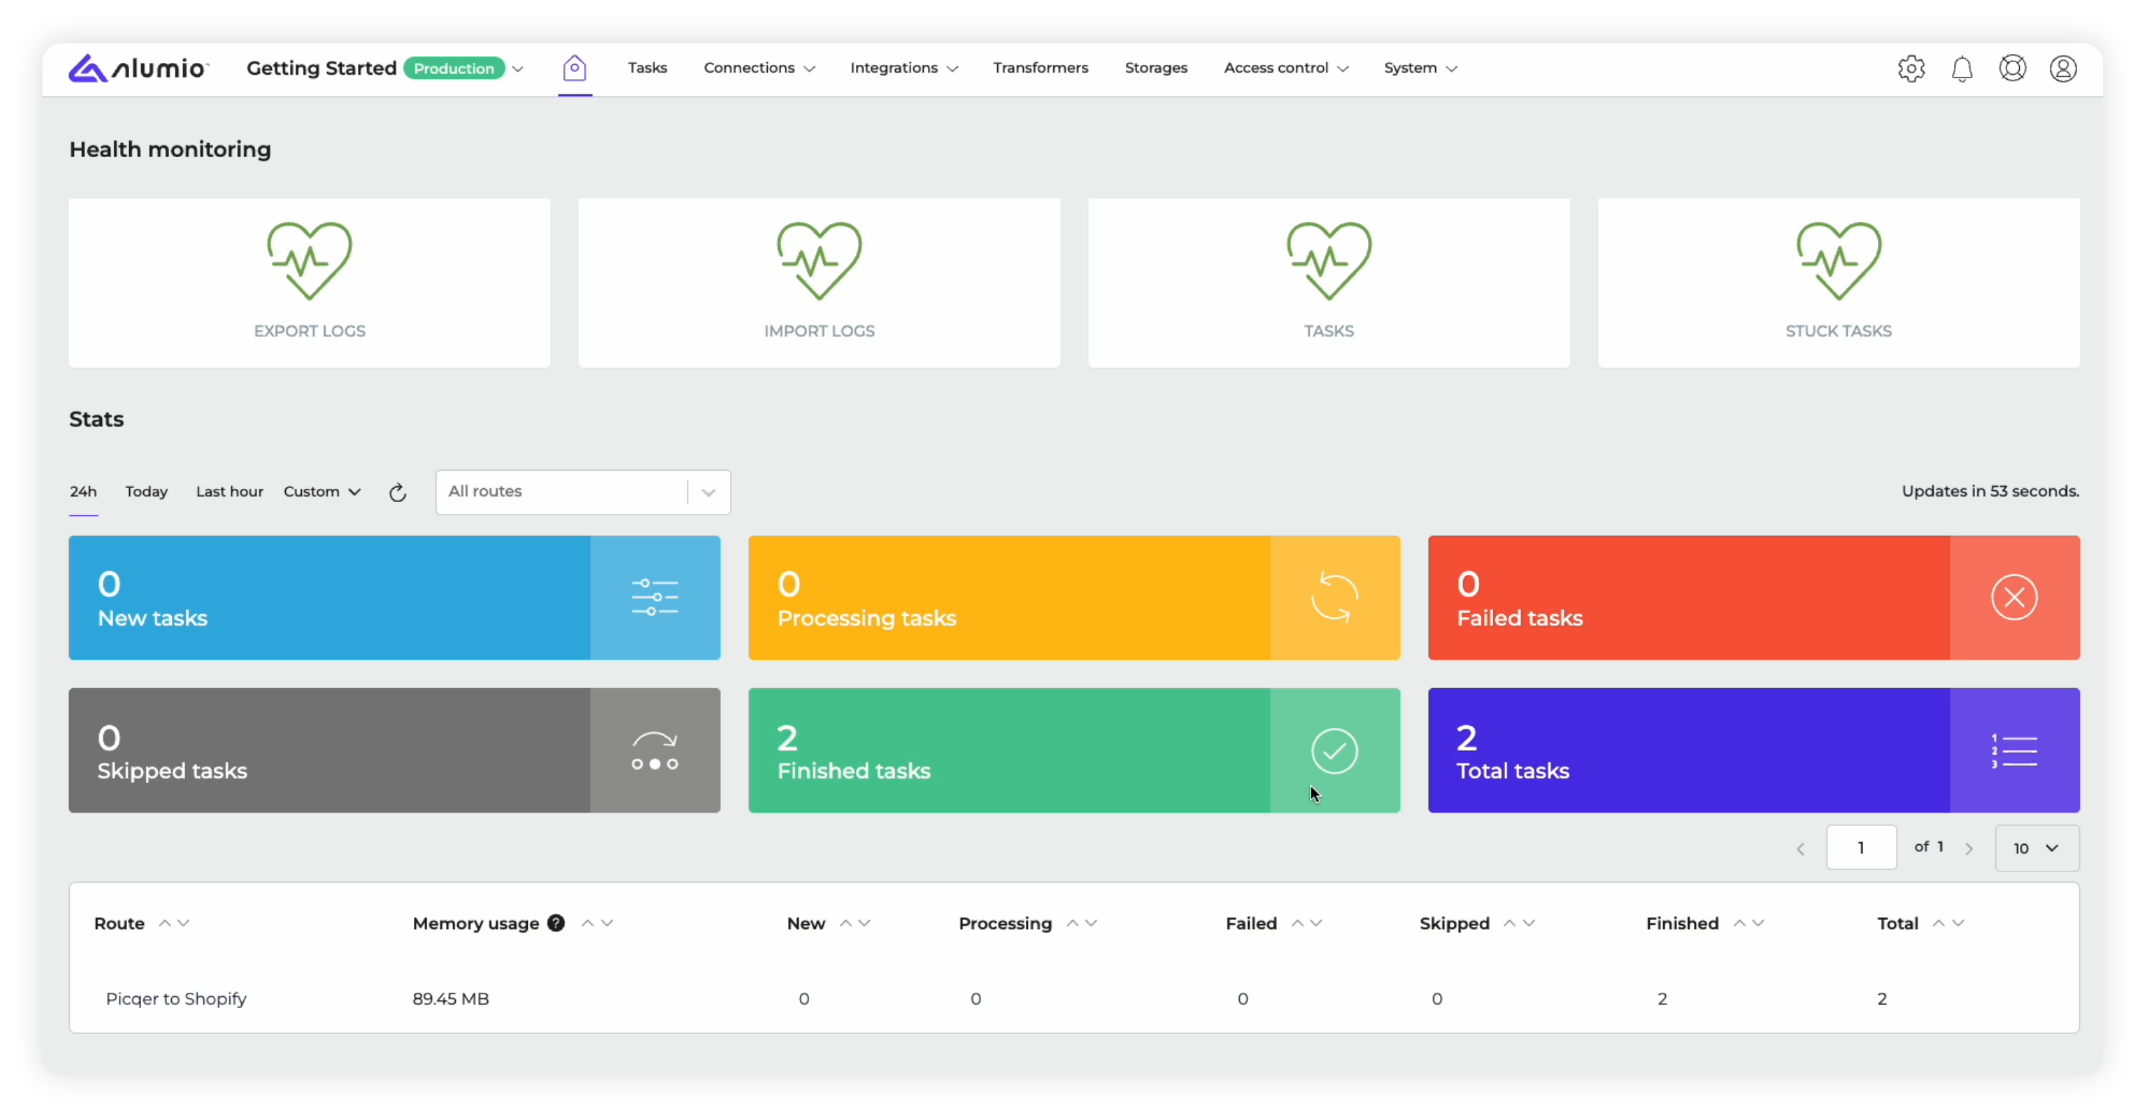
18. Route automation complete: After completing these steps, your Picqer to Shopify integration will now be scheduled to run as per your Scheduler (every 5 minutes, as per our example) automatically. On the homepage, you will now be able to monitor the Route you created, the Tasks it has generated, its memory usage, and if any errors occur you will be able to spot them immediately.
This ends our walkthrough of showing you how to build a basic integration, how to add Transformers to modify and enrich the data exchange, and finally, we explored how to schedule and automate each part of your integration. Yet, this only scratches the tip of the iceberg, when it comes to the near limitless capabilities and options that the Alumio iPaaS provides to expand your integrations in a fast, flexible, and future-proof way.


