

How to set up alerts on the Alumio platform
Once we have covered what pages you should be checking daily, we can explore how to set up Alerts on Alumio to automate error detection and detect data inconsistencies in real-time, ensuring no hiccup goes unnoticed.
What is an Alert?
Sometimes, when Incoming Configurations and Routes are running, an error occurs, which may abort the process, resulting in no tasks being created. If an error occurs within an outgoing process, the task will fail.
Such integration errors occur for various reasons that can be identified based on the error messages. Users need to be notified to ensure these errors are detected and resolved in a timely manner.
In the Alumio platform, an Alert is a notification system designed to inform users about specific events or issues related to their configurations and tasks. Alerts help users stay informed about the system's performance and any potential problems without the need for constant manual monitoring. Most importantly, users can set up custom Alumio Alerts to notify them of specific instances or inconsistencies.
Where can you view Alerts?
Alerts related to Incoming Configurations and Route Configurations can be found on their respective detail pages. The health monitoring section on the Dashboard page also serves as an initial indicator of any potential issues in the environment.
What are the types of Alerts in Alumio?
Incoming Configuration Alerts:
- Error during execution: Notifies users when an error occurs during the execution of incoming tasks.
- No new tasks created: Alerts users when no new tasks are created within a predefined time span, indicating a potential issue in a data flow.
Route Configuration Alerts:
- Specific status during execution: This function sends an Alert when a specific status (e.g., failure) occurs during the execution of tasks in a route.
How can you set up Alerts?
For Incoming Configurations:
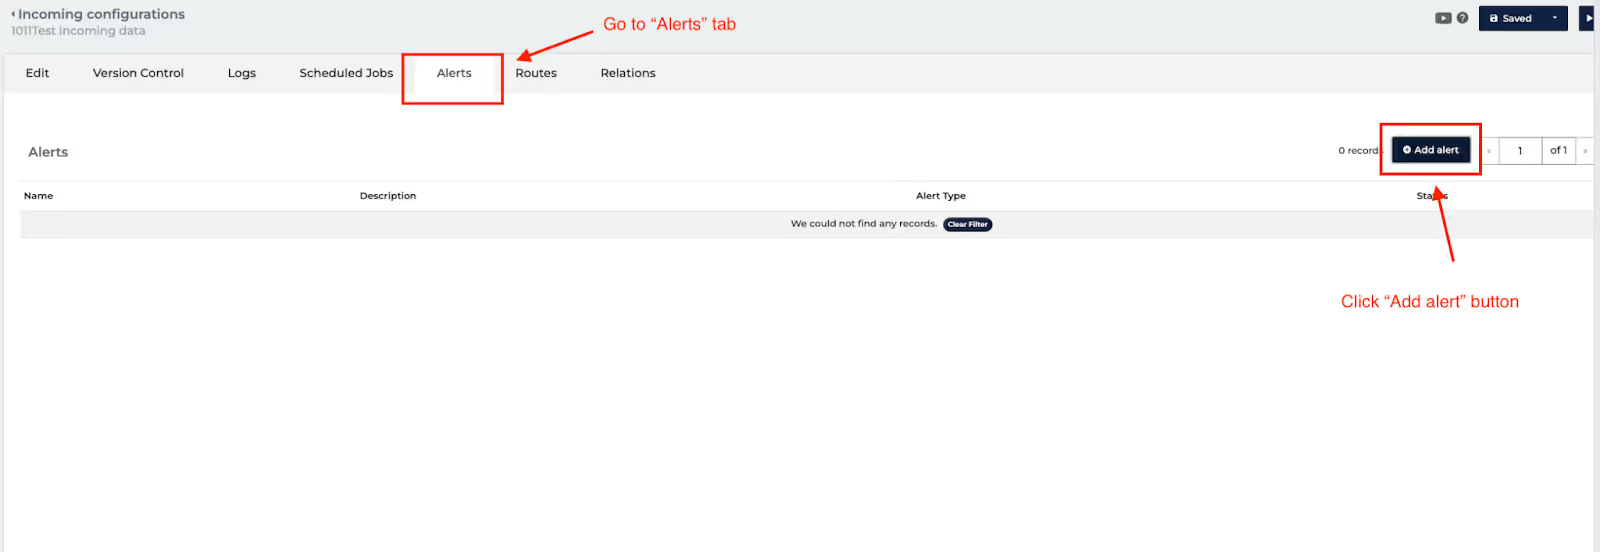
- Navigate to the Incoming Configuration detail page.
- Go to the "Alert" tab.
- Click the "Add Alert" button.
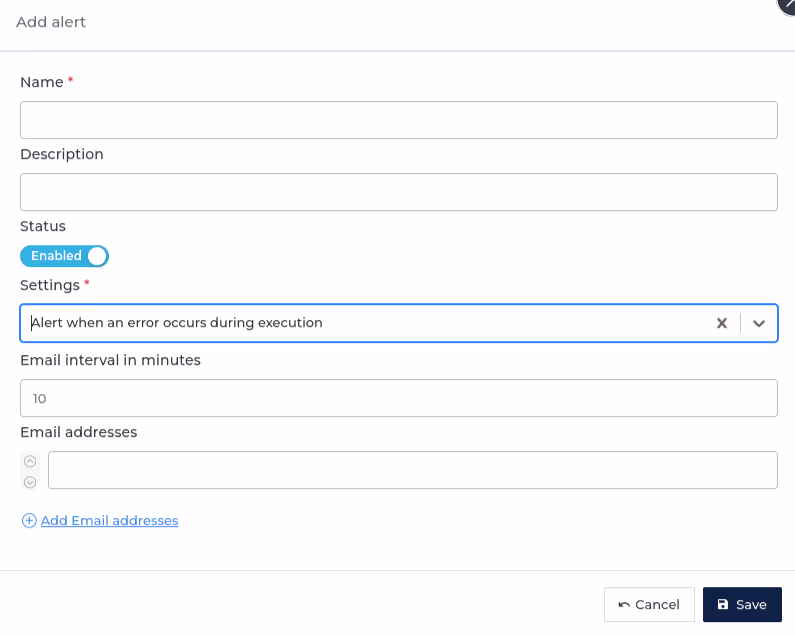
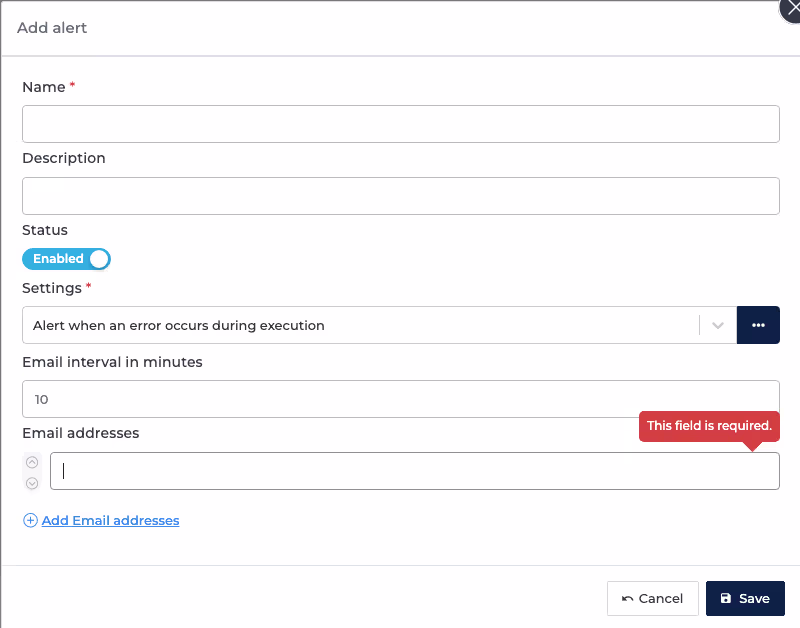
- In the new modal window, fill in the Alert name and description.
- Choose the type of Alert (e.g., error during execution).
- Fill in the interval values (in minutes) for the Alert.
- Add email addresses to which the Alert should be sent.
- Save the Alert.
For Route Configurations:
- Navigate to Connections → Routes and open the Route Configuration.
- Go to the "Alerts" tab.
- Click the "Add Alert" button.
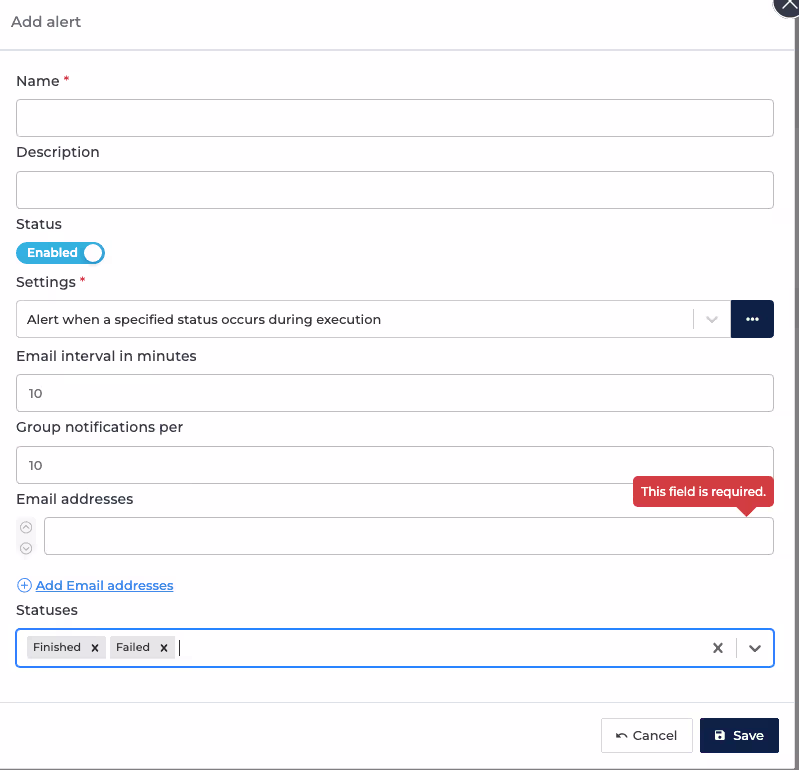
- Fill in the Name field for the Alert.
- Select the Alert type (e.g., Alert when a specific status occurs during execution).
- Fill in the Email interval in the minutes field (how often the Alert should be sent when an error occurs).
- Specify the Group notifications per field to determine the number of errors that will be grouped in one notification.
- Enter the email addresses to which the Alert should be sent.
- Select the specific statuses of the tasks that need to trigger the Alert.
- Save the configuration.
The Alerts in Alumio offer several benefits, including proactive monitoring, timely notifications, and increased efficiency. By allowing you to monitor the system proactively, Alerts help address issues before they escalate. They provide timely notifications about critical problems, ensuring a quick response to maintain system health. Additionally, Alerts reduce the need for manual monitoring by notifying you of significant events or errors.


